")
Calligraphy journaling is a beautiful and creative way to combine the art of calligraphy with the practice of journaling. With calligraphy journaling, you can add a personal touch to your daily reflections, gratitude lists, and creative writing. In this step-by-step guide to calligraphy journaling, we’ll explore the tools and techniques you need to get started.
Step 1: Choose Your Journal
The first step in calligraphy journaling is choosing the right journal. Look for a journal with high-quality paper that can withstand the ink and pressure of calligraphy pens. You may also want to choose a journal with a hardcover or a sturdy binding to protect your pages. Choose a size and style that suits your preferences, whether you prefer a small pocket journal or a large sketchbook-style journal.
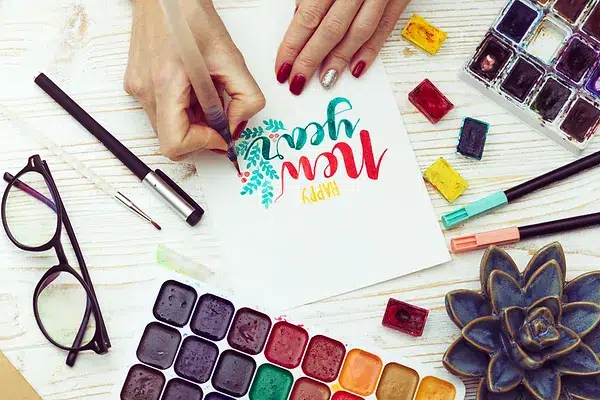
Step 2: Gather Your Calligraphy Tools
To get started with calligraphy journaling, you’ll need a few essential tools:
- Calligraphy pens: Choose a set of calligraphy pens with different nib sizes to create a variety of line thicknesses and styles.
- Ink: Look for ink that is suitable for calligraphy, such as India ink or sumi ink. Choose a color that complements your journal pages.
- Pencil: Use a pencil to sketch out your calligraphy before you begin writing with ink.
- Eraser: Keep an eraser handy to correct any mistakes.
- Ruler: Use a ruler to create straight lines or grids for your calligraphy.
- Washi tape: Use washi tape to create borders or frames for your calligraphy.
Step 3: Practice Your Calligraphy
Before you start calligraphy journaling, it’s important to practice your calligraphy skills. Start by practicing basic strokes and letters using your calligraphy pens and ink. Focus on creating consistent lines and strokes, and experiment with different styles and flourishes.
Step 4: Plan Your Layout
Before you start writing in your journal, plan out the layout for your calligraphy. Consider using different sizes and styles of calligraphy for headings, subheadings, and body text. Use your ruler to create grids or frames for your calligraphy, and experiment with different colors of ink to create contrast.
Step 5: Write in Your Journal
Once you’ve planned your layout and practiced your calligraphy, it’s time to start writing in your journal. Use your pencil to sketch out your calligraphy before you start writing with ink. Take your time and focus on creating consistent strokes and lines. If you make a mistake, use your eraser to correct it before moving on.
Step 6: Add Embellishments
To make your calligraphy journaling even more beautiful and creative, consider adding embellishments such as:
- Watercolor: Use watercolor paints to create washes of color behind your calligraphy.
- Stickers: Use stickers to add decorative elements to your journal pages.
- Embossing: Use embossing powder and a heat gun to add texture and dimension to your calligraphy.
- Stamps: Use rubber stamps to add decorative elements and text to your journal pages.
Step 7: Reflect and Write
Calligraphy journaling is a great way to combine calligraphy with the practice of journaling. Take time to reflect on your day, write about your feelings, or express gratitude in your journal. Use your calligraphy to add a personal touch to your writing and make your journal pages even more beautiful.
Step 8: Experiment and Have Fun
Calligraphy journaling is a creative and fun way to express yourself and practice your calligraphy skills. Experiment with different styles and techniques, and don’t be afraid to make mistakes. Remember that calligraphy journaling is a process, and the more you practice, the better you will become.
Tips for Success
- Practice regularly: The key to improving your calligraphy skills is to practice regularly. Set aside time each day or each week to practice your calligraphy.
- Start with the basics: Before you start writing full sentences and paragraphs, focus on practicing basic strokes and letters.
- Use the right tools: Invest in high-quality calligraphy pens, ink, and paper to ensure the best results.
- Take your time: Calligraphy requires patience and precision. Take your time and focus on creating consistent lines and strokes.
- Don’t be afraid to make mistakes: Making mistakes is a natural part of the learning process. Embrace your mistakes and use them as an opportunity to learn and improve.
Conclusion
Calligraphy journaling is a beautiful and creative way to combine calligraphy with the practice of journaling. With the right tools and techniques, you can create beautiful journal pages that express your thoughts, feelings, and creativity. Whether you’re a beginner or an experienced calligrapher, calligraphy journaling is a fun and rewarding practice that can help you improve your calligraphy skills and express yourself in new and creative ways.