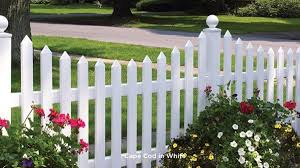
Vinyl fencing is a great option for those looking for a low-maintenance and durable fencing material. However, there may be times when you need to cut vinyl fencing to fit a specific space or to make repairs. Cutting vinyl fencing can be intimidating, but with the right tools and techniques, it can be a relatively simple process. In this article, we will discuss the best way to cut vinyl fencing.
Gather the Necessary Tools
Before you begin cutting your vinyl fencing, you will need to gather the necessary tools. These tools include a tape measure, a pencil, a circular saw or a handsaw, and safety gear such as safety glasses and gloves. If you are using a circular saw, make sure that the blade is designed for cutting vinyl.
Measure and Mark the Cut
Before you make any cuts, you will need to measure and mark the cut on your vinyl fencing. Use a tape measure to measure the distance between the two points where you need to cut the fence. Mark the cut line on the fence using a pencil.
Prepare the Fencing for Cutting
Once you have marked the cut line on the vinyl fencing, you will need to prepare it for cutting. Lay the fencing on a flat surface and secure it in place using clamps or weights. Make sure that the vinyl fencing is stable and will not move during the cutting process.
Cutting the Vinyl Fencing
There are two main methods for cutting vinyl fencing: using a circular saw or using a handsaw.
Circular Saw Method:
If you are using a circular saw, make sure that the blade is designed for cutting vinyl. Set the blade depth to the thickness of the vinyl fencing. Turn on the saw and carefully guide the blade along the cut line, applying light pressure. Be sure to wear safety glasses and gloves while using a circular saw.
Handsaw Method:
If you are using a handsaw, choose a saw with fine teeth designed for cutting plastic. Hold the saw at a 45-degree angle to the vinyl fencing and carefully saw through the material. Take your time and be careful not to apply too much pressure, as this can cause the vinyl to crack.
Finishing the Cut
Once you have made the cut, use fine-grit sandpaper to smooth out any rough edges. This will help prevent the vinyl from cracking or splitting over time. Use a damp cloth to clean up any debris or dust left behind from the cutting process.
Installing the Cut Vinyl Fencing
After you have cut your vinyl fencing, you can install it in its new location. If you are making repairs, use PVC cement to glue the cut vinyl fencing back in place. If you are installing a new fence, follow the manufacturer’s instructions for installation.
Tips for Cutting Vinyl Fencing
Always wear safety glasses and gloves when cutting vinyl fencing.
Make sure that your tools are designed for cutting vinyl.
Take your time and be careful not to apply too much pressure, as this can cause the vinyl to crack.
If you are using a circular saw, make sure that the blade is designed for cutting vinyl and set the blade depth to the thickness of the vinyl fencing.
If you are using a handsaw, choose a saw with fine teeth designed for cutting plastic.
Use fine-grit sandpaper to smooth out any rough edges after cutting.
Clean up any debris or dust left behind from the cutting process.
In conclusion, cutting vinyl fencing can be a simple process with the right tools and techniques. Always make sure that you are using the right tools and wearing the appropriate safety gear. Take your time and be careful not to apply too much pressure, as this can cause the vinyl to crack. Smooth out any rough edges with fine-grit sandpaper and clean up any debris or dust left behind from the cutting process. Following these tips and techniques will help you to cut vinyl fencing safely and effectively, allowing you to create a customized fence that fits your specific needs.

