")
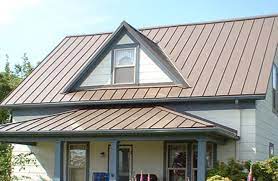
If you’re considering a metal roof for your home or building, one popular option is a burnished slate color. Burnished slate is a dark gray color with a metallic sheen that adds a modern, sleek look to any structure. In this step-by-step guide, we’ll walk you through the process of installing a burnished slate metal roof.
Step 1: Measure the Roof
Before you order materials or start the installation process, you’ll need to accurately measure the roof. Measure the length and width of each section of the roof, including any dormers or other features. Use these measurements to calculate the total square footage of the roof. This will help you determine how much metal roofing material you’ll need.
Step 2: Choose the Right Materials
Once you have the measurements, you can order the necessary materials. Burnished slate metal roofing panels are typically made from steel or aluminum and come in a variety of profiles, including standing seam, corrugated, and ribbed. Choose the profile that best suits your aesthetic preferences and structural needs.
In addition to the panels, you’ll also need other materials such as trim pieces, flashing, screws, and sealant. These can be ordered from the same supplier as the panels to ensure a cohesive look and proper fit.
Step 3: Prepare the Roof
Before installing the metal roofing panels, you’ll need to prepare the roof. This includes removing any old roofing material, repairing any damage to the underlying structure, and installing an underlayment. The underlayment provides a moisture barrier and helps to prevent leaks.
Step 4: Install the Trim Pieces
Once the roof is prepared, you can begin installing the trim pieces. These include drip edge, ridge caps, and corner trim. Trim pieces are important for sealing the edges of the roof and preventing water from seeping in.
Step 5: Install the Metal Panels
With the trim pieces in place, you can start installing the metal panels. Begin at the lowest point of the roof and work your way up. The panels should overlap by at least 1 inch to ensure proper water drainage. Use screws to attach the panels to the underlying structure, making sure to follow the manufacturer’s instructions for spacing and placement.
Step 6: Install Flashing
Flashing is used to seal the gaps and joints between the metal roofing panels and other structures such as chimneys, vents, and skylights. This is an important step to prevent leaks and water damage. Use the appropriate type of flashing for each area, such as vent flashing or chimney flashing.
Step 7: Seal the Roof
Finally, seal the roof to prevent water from seeping in and to provide additional insulation. Use a sealant that is compatible with the metal roofing material and follow the manufacturer’s instructions for application. This will help to ensure that the roof is watertight and energy-efficient.
Conclusion:
Installing a burnished slate metal roof can add a modern, sleek look to any home or building. With the right materials and proper installation techniques, a metal roof can also provide durability, energy efficiency, and protection against the elements. If you’re considering a burnished slate metal roof for your property, follow these steps to ensure a successful installation. Be sure to work with an experienced roofing contractor to ensure that the job is done right and to avoid any potential issues down the line.