")
Converting a shed into a salon can be a fun and cost-effective way to start your own business or expand an existing one. However, it also requires careful planning, attention to detail, and a thorough understanding of building codes and regulations. This guide will walk you through the steps involved in transforming a shed into a functional and stylish salon.
Step 1: Conduct a Site Assessment
The first step in converting a shed into a salon is to conduct a site assessment. You’ll need to take a close look at the shed’s existing structure, checking for any damage or safety hazards. Make sure the foundation is solid, and that the roof and walls are in good condition. You’ll also need to consider the location of the shed and its proximity to power, water, and sewage lines.
Step 2: Create a Floor Plan
Once you’ve assessed the shed, the next step is to create a floor plan. This plan should take into account the intended use of each room, the flow of traffic, and the placement of furniture and equipment. A floor plan can help you visualize the changes you want to make and will serve as a blueprint for the renovation process.
Step 3: Obtain Necessary Permits and Approvals
Before you begin any work on the shed, you’ll need to obtain any necessary permits and approvals from your local government. This will likely include a building permit, an electrical permit, and a plumbing permit, as well as a certificate of occupancy. Make sure you understand all the requirements and regulations before starting any work.
Step 4: Upgrade the Electrical System
In order to convert a shed into a salon, you’ll need to upgrade the electrical system to meet the demands of your equipment and appliances. This may involve installing new wiring, adding electrical outlets, and upgrading the lighting system. Make sure the electrical work is done by a licensed electrician, and that all electrical upgrades meet local building codes and regulations.
Step 5: Install Plumbing
Next, you’ll need to install plumbing to provide water and sewage services to the shed. This may include installing a sink, a toilet, and a shower, as well as running water and sewage lines to the shed. Make sure all plumbing work is done by a licensed plumber, and that all plumbing upgrades meet local building codes and regulations.
Step 6: Insulate and Drywall the Shed
Insulating and drywalling the shed can help improve its energy efficiency and make it more comfortable for clients and employees. You’ll want to make sure the insulation is installed properly and that the drywall is sealed and painted. This will also provide a blank canvas for you to decorate and personalize the space.
Step 7: Install Flooring
Installing flooring is a key step in converting a shed into a salon. You’ll want to choose a flooring material that is durable, easy to clean, and comfortable to walk on. Popular options for salon flooring include tile, carpet, and hardwood. Make sure the flooring is installed properly, and that it meets all local building codes and regulations.
Step 8: Paint and Decorate
Once the insulation, drywall, and flooring have been installed, it’s time to paint and decorate the shed. This is where you can let your creative side take over and make the space your own. Choose a color scheme that reflects your business’s brand, and select decorations that are functional and appealing to clients.
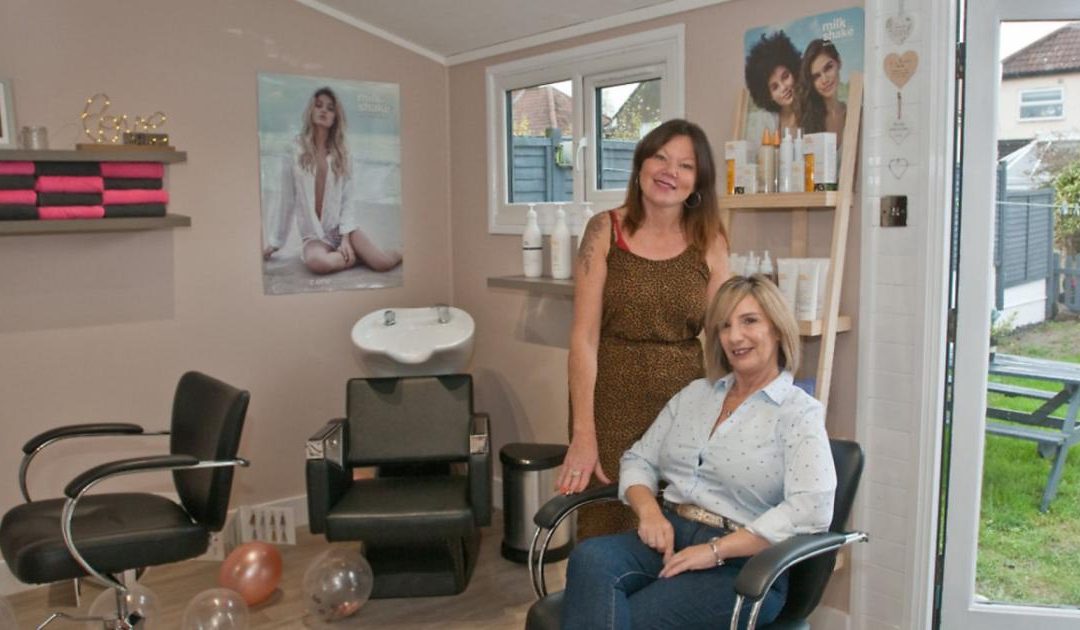
Step 9: Install Equipment and Furnishings
Finally, you’ll need to install equipment and furnishings to complete the conversion of the shed into a salon. This may include styling chairs, wash basins, mirrors, shelving convert a shed into a salon.