")
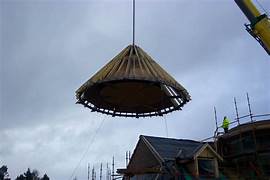
A witches hat, also known as a witch’s cap or witch’s hat vent, is a distinctive roof vent commonly used in residential and commercial buildings. Its unique design resembles a pointed hat or cone, which helps to ventilate the attic space and prevent moisture buildup. In this guide, we will explore everything you need to know about witches hat for roofing:
Purpose and Function:
The primary function of a witches hat vent is to provide attic ventilation. It allows hot air and moisture to escape from the attic, helping to regulate the temperature and prevent the accumulation of moisture that can lead to mold, rot, and other structural issues. By promoting proper airflow, witches hat vents contribute to a healthier and more energy-efficient home.
Design and Construction:
Witches hat vents are typically made of durable materials such as metal, plastic, or composite materials. They consist of a base that attaches to the roof, a vertical stack or cone that rises above the roofline, and a cap or cover that sits atop the cone. The cone-shaped design helps to create a natural venturi effect, drawing air up and out of the attic.
Roof Compatibility:
Witches hat vents can be installed on various roofing materials, including asphalt shingles, metal roofing, wood shakes, and tiles. Proper installation requires flashing around the base of the vent to ensure a watertight seal and prevent water infiltration.
Ventilation Requirements:
The number and size of witches hat vents needed for effective attic ventilation depend on several factors, including the size of the attic space, the climate in your region, and the type of roofing material. As a general guideline, it is recommended to have a minimum of one square foot of vent area for every 150 square feet of attic space.
Installation Process:
Installing a witches hat vent typically involves the following steps:a. Determine the optimal location for vent placement. This is usually near the peak of the roof to take advantage of the natural rising of hot air.b. Remove any existing roofing material, if necessary, in the area where the vent will be installed.c. Install flashing around the vent base, ensuring a proper seal against water infiltration. This may involve lifting and reattaching surrounding roofing materials.d. Attach the vent base securely to the roof using roofing nails or screws, following the manufacturer’s instructions.e. Slide the vertical stack or cone over the vent base and secure it in place.f. Place the cap or cover on top of the cone, ensuring it fits securely and provides protection against rain, snow, and debris.
Maintenance and Inspection:
Regular maintenance and inspection of witches hat vents are essential to ensure their proper functioning. Inspect the vents periodically for any signs of damage, such as cracks, loose fasteners, or debris blockage. Clear away any leaves, twigs, or other obstructions that may impede airflow. Additionally, check the flashing around the vent base for any signs of deterioration and repair or replace as needed.
Considerations for Severe Weather:
In regions prone to severe weather conditions, such as hurricanes or high winds, it is important to choose witches hat vents that are designed and rated to withstand these forces. Look for vents that meet local building codes and standards for wind resistance.
Professional Installation:
While some homeowners may choose to install witches hat vents themselves, it often recommend to consult a professional roofing contractor. They have the expertise and experience to ensure proper installation, adequate ventilation, and compliance with local building codes.
In conclusion, witches hat vents play a crucial role in attic ventilation, promoting airflow and preventing moisture buildup. Their distinctive design adds a unique architectural element to the roofline while contributing to a healthier and more energy-efficient home. By understanding their purpose.