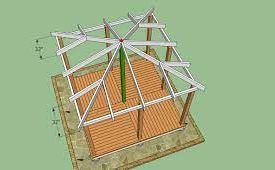
A gazebo is a wonderful addition to any outdoor space. It provides a place to relax, entertain, and enjoy the great outdoors. One of the most important aspects of a gazebo is the roof. A well-designed roof not only protects you from the sun and rain but also adds to the aesthetic appeal of the structure. In this step-by-step guide, we will discuss some ideas for gazebo roofing.
Step 1: Determine Your Budget
Before you start planning your gazebo roofing, you need to determine your budget. The cost of roofing materials can vary greatly depending on the type of material you choose. A basic metal roof may cost less than a high-end cedar shake roof, for example. Once you have a budget in mind, you can begin to explore your options.
Step 2: Choose Your Roofing Material
There are many different types of materials you can use for your gazebo roof. Some of the most popular options include:
- Asphalt shingles: This is a common roofing material that is affordable and easy to install. It comes in a variety of colors and styles to match the design of your gazebo.
- Metal roofing: Metal roofs are durable and long-lasting. They come in a variety of colors and styles and are resistant to fire and weather damage.
- Cedar shakes: Cedar shakes are a natural and attractive roofing material that can last for decades. They require more maintenance than other options but can add a rustic charm to your gazebo.
- Thatched roofing: Thatched roofs are made from natural materials like grass or reeds. They are environmentally friendly and provide a unique look to your gazebo.
Step 3: Determine the Style of Roof
Once you have chosen your roofing material, you need to decide on the style of roof for your gazebo. Some popular options include:
- Hip roof: This is a common style of roof for gazebos. It slopes down on all four sides and creates a pyramid shape.
- Gable roof: A gable roof has two sloping sides that meet in the middle to form a peak. This is a popular style for larger gazebos.
- Flat roof: A flat roof is a simple and modern option. It is easy to install and maintain but may not be as visually appealing as other options.
- Dome roof: A dome roof is a unique and eye-catching option. It provides a lot of height and can create a cozy atmosphere inside your gazebo.
Step 4: Consider Adding Skylights
Adding skylights to your gazebo roof can provide natural light and ventilation. They can also add to the visual appeal of your gazebo. Skylights come in a variety of shapes and sizes, and can be customized to fit your specific needs.
Step 5: Hire a Professional or DIY?
Depending on your experience and skills, you may be able to install your gazebo roof yourself. However, if you are unsure of the process or do not have the necessary tools, it may be best to hire a professional. A professional can ensure that your roof is installed correctly and will last for years to come.
Step 6: Maintenance
Once your gazebo roof is installed, it is important to perform regular maintenance to ensure it lasts as long as possible. This includes:
- Cleaning: Remove any debris, leaves, or branches from the roof regularly to prevent damage.
- Inspect for damage: Check for any signs of damage, such as missing or loose shingles, and repair them as soon as possible.
- Trim surrounding trees: Trim any trees or branches that could potentially fall and damage the roof.
- Repaint or reseal: Depending on the material, you may need to repaint or reseal the roof every few years to protect it from weather damage.
In conclusion, a well-designed and properly installed gazebo roof can add both function and beauty to your outdoor space. By following these steps, you can choose the best roofing material, style, and options for your gazebo, and ensure that it is installed and maintained correctly. Remember to always prioritize safety and seek professional help if needed. With the right gazebo roof, you can enjoy your outdoor space in comfort and style for years to come.

