")
Introduction:
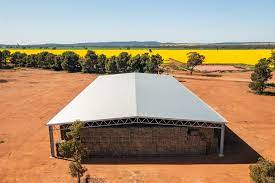
Hay sheds are essential structures for farmers and ranchers to store and protect their hay from the elements. Whether you’re a seasoned agriculturalist or a beginner, building a hay shed requires careful planning and execution. In this step-by-step guide, we will walk you through the process of constructing a hay shed, ensuring that your valuable hay stays dry, well-ventilated, and easily accessible.
Step 1: Determine the Size and Location:
Start by determining the size of the hay shed based on the amount of hay you need to store. Consider the dimensions of hay bales and plan for additional space for airflow. Select a suitable location for the shed, ensuring it is on level ground and easily accessible for loading and unloading hay.
Step 2: Obtain Necessary Permits:
Check with your local building authorities to determine if you need any permits or approvals to construct a hay shed. Different areas may have specific regulations regarding the size, height, and construction materials. Obtain the required permits before proceeding with the construction.
Step 3: Gather Materials and Tools:
Compile the necessary materials and tools for building the hay shed. This typically includes lumber, roofing materials (such as metal or shingles), nails or screws, concrete (if needed for a foundation), a hammer, a circular saw, a level, measuring tape, and safety equipment (gloves, safety glasses).
Step 4: Prepare the Foundation:
If required or desired, prepare the foundation for the hay shed. This can be a concrete slab, piers, or even gravel. Clear the area of any debris or vegetation, level the ground, and construct the foundation according to the chosen method. Ensure the foundation is strong and able to support the weight of the hay and shed structure.
Step 5: Build the Frame:
Start constructing the frame of the hay shed. Begin with the vertical supports (posts) and connect them with horizontal beams to create the skeleton of the structure. Use the level to ensure everything is plumb and square. Secure the connections with nails or screws, providing stability and durability.
Step 6: Install the Roof:
Once the frame is complete, install the roof. Choose a roofing material that suits your preferences and climate conditions. Metal roofing is often preferred for its durability and resistance to weather elements. Install the roofing material according to the manufacturer’s instructions, ensuring proper overlap and sealing.
Step 7: Add Walls and Doors:
Depending on your needs and preferences, you may choose to add walls to the hay shed. This can be done using the same materials as the roof or with additional siding. Install walls securely to protect the hay from wind, rain, and other elements. Include doors or openings for easy access when loading and unloading hay.
Step 8: Provide Ventilation:
Proper ventilation is crucial for maintaining the quality of stored hay. Install vents or openings in strategic locations to allow for adequate airflow. This helps prevent moisture buildup and reduces the risk of mold or rot. Consider adding windows or adjustable vents that can be opened or closed as needed.
Step 9: Ensure Structural Stability:
Once the hay shed is complete, inspect the structure to ensure stability and safety. Check all connections, braces, and supports to make sure they are secure and properly fastened. Reinforce any weak areas or make necessary adjustments to ensure the shed can withstand heavy loads and adverse weather conditions. Hay sheds
Step 10: Organize the Interior:
After construction, organize the interior of the hay shed for efficient hay storage. Use pallets or raised platforms to keep the hay off the ground, allowing for proper airflow and reducing the risk of moisture absorption. Stack the hay in an organized manner, leaving pathways for easy access and inspection. Hay sheds
Conclusion:
Constructing a hay shed is a valuable investment for farmers and ranchers to protect their hay and ensure its quality. By following this step-by-step guide, you can build a sturdy and functional hay shed that meets your needs. Remember to plan the size and location, obtain necessary permits, gather materials and tools, prepare the foundation, build the frame, install the roof and walls, provide ventilation, ensure structural stability, and organize the interior. Enjoy the convenience and peace of mind that comes with a well-built hay shed, knowing your valuable hay is safe and protected.