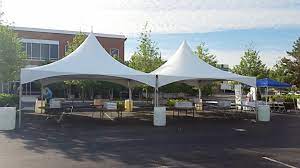
Anchoring a canopy on cement is a simple process that requires a few basic tools and some anchoring hardware. Anchoring a canopy on cement is important to keep it secure and stable, especially during windy or stormy conditions. Here are the steps to follow to anchor a canopy on cement:
Step 1: Choose the Anchoring Hardware
There are different types of anchoring hardware that can be used to anchor a canopy on cement. The most common types are concrete anchors, wedge anchors, and sleeve anchors. Concrete anchors are suitable for light-duty applications, while wedge anchors and sleeve anchors are ideal for heavy-duty applications.
When choosing the anchoring hardware, consider the size and weight of the canopy, the type of cement, and the weather conditions in the area. It is important to select hardware that is strong enough to support the weight of the canopy and withstand the forces of wind, rain, and other weather elements.
Step 2: Mark the Anchoring Locations
Once you have chosen the anchoring hardware, mark the locations where you will anchor the canopy on the cement. Use a measuring tape and a pencil to measure and mark the locations where the anchors will be installed.
If the canopy has four legs, mark the locations for the anchors at the base of each leg. If the canopy has only two legs, mark the locations at the midpoint of each leg.
Step 3: Drill Holes in the Cement
Using a hammer drill or a rotary hammer with a masonry bit, drill holes in the cement at the marked locations. The size of the hole should be slightly smaller than the diameter of the anchor.
It is important to wear safety goggles and a dust mask while drilling to protect your eyes and lungs from debris.
Step 4: Insert the Anchors
Insert the anchors into the holes in the cement. Use a hammer or a wrench to drive the anchors into the holes until they are flush with the surface of the cement.
Step 5: Attach the Canopy Legs to the Anchors
Once the anchors are installed, attach the canopy legs to the anchors. Place the canopy legs over the anchors and use bolts, washers, and nuts to secure the legs to the anchors.
Make sure that the bolts are tightened securely to prevent the canopy from moving or shifting.
Step 6: Test the Stability of the Canopy
After attaching the canopy legs to the anchors, test the stability of the canopy by pushing and pulling it in different directions. If the canopy feels wobbly or unstable, tighten the bolts or add more anchors to provide additional support.
Step 7: Secure the Canopy to the Ground
To provide additional stability, you can secure the canopy to the ground using stakes or tie-downs. Place the stakes or tie-downs at the corners of the canopy and use ropes or straps to secure the canopy to the ground.
Make sure that the ropes or straps are tight and secure to prevent the canopy from lifting off the ground or tipping over.
Step 8: Remove the Canopy During Severe Weather
It is important to remove the canopy during severe weather conditions such as heavy rain, strong winds, or snowfall. The weight of the snow or the force of the wind can cause the canopy to collapse or topple over, causing damage to the canopy or injury to people around it.
To prevent damage and injury, remove the canopy during severe weather and store it in a safe place until the weather conditions improve.
Conclusion
Anchoring a canopy on cement is an easy process that can be completed in a few simple steps. Choosing the right anchoring hardware, drilling holes in the cement, and securing the canopy legs to the anchors are the key steps to anchoring a canopy on cement. It is important to test the stability of the canopy and secure it to the ground using stakes or tie-downs for added stability. However, it is essential to remove the canopy during severe weather conditions to prevent damage or injury.

