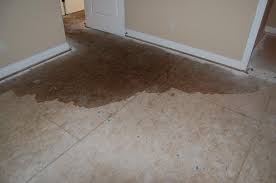
Water damage under a tile floor can be a frustrating problem to deal with, as it can be difficult to identify the source of the water and the extent of the damage. However, it is important to address this issue as soon as possible to prevent further damage to the structure of your home and the health of those living there. In this article, we will discuss how to fix water damage under a tile floor.
Step 1: Identify the Source of the Water
The first step in fixing water damage under a tile floor is to identify the source of the water. This may be a leaky pipe, a damaged roof, or a faulty appliance. It is important to address the source of the water before attempting to repair the damage, as any repairs made without addressing the source of the water will be temporary at best.
Step 2: Remove the Tile
Once the source of the water has been identified and addressed, the next step is to remove the damaged tile. Begin by using a hammer and chisel to carefully remove the grout around the damaged tile. Then, use a putty knife to gently pry the tile up from the subfloor.
Be careful not to damage any surrounding tiles, as they may also need to be removed if they are damaged or if water has seeped beneath them. If the tile is difficult to remove, use a heat gun or a hair dryer to soften the adhesive underneath.
Step 3: Assess the Damage
With the tile removed, you can now assess the extent of the water damage to the subfloor. If the subfloor is still wet, use a wet/dry vacuum to remove as much water as possible. Allow the subfloor to dry completely before proceeding with any repairs.
If the subfloor is damaged or rotted, it will need to be replaced. Use a circular saw to cut out the damaged section of the subfloor, taking care to cut along the center of the floor joists. Then, use a pry bar to remove the damaged subfloor and any remaining adhesive or debris.
Step 4: Replace the Subfloor
With the damaged subfloor removed, you can now replace it with a new piece of plywood. Cut the new plywood to size and secure it to the floor joists using screws or nails. Be sure to leave a small gap between the new plywood and the surrounding subfloor to allow for expansion and contraction.
Step 5: Replace the Tile
Once the new subfloor is in place, you can begin replacing the tile. Apply a thin layer of adhesive to the subfloor using a notched trowel, being careful not to apply too much adhesive.
Carefully place the new tile into position, pressing it firmly into the adhesive. Use spacers to maintain a consistent gap between tiles. Repeat this process for any other tiles that were removed.
Step 6: Grout the Tile
With the tile in place, you can now apply grout to the gaps between the tiles. Mix the grout according to the manufacturer’s instructions and apply it using a grout float, making sure to fill all the gaps.
Use a damp sponge to wipe away any excess grout from the tile surface, being careful not to remove too much. Allow the grout to dry completely before walking on the floor.
Step 7: Seal the Grout
Once the grout has dried, you can apply a sealer to help protect it from water and stains. Follow the manufacturer’s instructions for application and allow the sealer to dry completely before using the floor.
Preventing Water Damage
While it is important to know how to fix water damage under a tile floor, it is even more important to take steps to prevent water damage from occurring in the first place. Here are a few tips to help prevent water damage:
Address any leaks or plumbing issues promptly. If you notice a leak or plumbing issue, such as a dripping faucet or a clogged drain, address it as soon as possible to prevent water damage from occurring.
Install a moisture barrier. A moisture barrier can help prevent water from seeping through the subfloor and causing damage. Install a moisture barrier under your tile floor, especially in areas of your home that are prone to moisture, such as bathrooms and kitchens.
Use water-resistant materials. When installing a new tile floor, use water-resistant materials, such as porcelain or ceramic tile. Avoid using natural stone or other porous materials that are more prone to water damage.
Keep your home well-ventilated. Proper ventilation can help prevent moisture buildup in your home. Use exhaust fans in your bathroom and kitchen to remove moisture from the air, and open windows and doors to promote air circulation.
Regularly inspect your home for water damage. Regularly inspect your home, especially areas that are prone to moisture, such as basements and crawl spaces, for signs of water damage. Look for warped or stained walls and floors, and address any issues promptly.
In conclusion, fixing water damage under a tile floor can be a complex and time-consuming process, but it is important to address the issue promptly to prevent further damage to your home. By following these steps and taking preventative measures, you can help protect your home from water damage and ensure that your tile floor remains in good condition for years to come.

