")
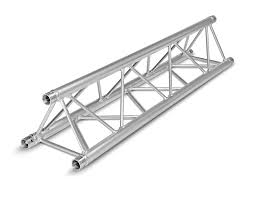
A mini beam truss is a type of roof truss used to provide support for a small or medium-sized roof. Installing a mini beam truss can be a daunting task, but with the right tools and techniques, it can be done by a skilled DIYer or a professional contractor. In this guide, we’ll walk you through the steps to install a mini beam truss.
Step 1: Measure and Cut the Truss Members
The first step in installing a mini beam truss is to measure and cut the truss members. You will need two main beams, also known as the top chords, and a bottom chord. The top chords should be the same length, and the bottom chord should be the same length as the distance between the two top chords.
To measure the length of the top chords, measure the distance between the two walls where the truss will be installed. To measure the length of the bottom chord, measure the distance between the two top chords at their widest point.
Once you have your measurements, use a saw to cut the truss members to the correct length.
Step 2: Mark the Truss Members
Next, mark the truss members where they will connect to each other. Use a square to make sure the marks are straight and even. The marks should indicate where the truss members will connect and should space evenly apart.
Step 3: Drill Holes in the Truss Members
Using a drill with a bit that is slightly smaller than the diameter of your screws, drill pilot holes where the truss members will connect. This will help prevent the wood from splitting when the screws are driven in.
Step 4: Assemble the Truss Members
Lay the truss members out on a flat surface and begin assembling them. Place the bottom chord in between the two top chords and line up the marks that you made in Step 2. Using wood screws, attach the bottom chord to the top chords at each marked location.
Step 5: Lift the Truss into Place
Once the truss is assembl, it’s time to lift it into place. This is a two-person job and should do with caution to ensure that the truss lifts safely and securely.
To lift the truss, position a ladder against the wall where the truss will install. One person should climb up the ladder and position themselves on the roof. The other person should be on the ground holding the truss.
Using a rope or straps, secure the truss to the ladder. The person on the roof should then guide the truss into place, while the person on the ground pushes it up from below. Once the truss is in position, the person on the roof should secure it to the wall using wood screws.
Step 6: Install Additional Trusses
If you need more than one truss to support your roof, repeat steps 1-5 to install additional trusses. Be sure to space the trusses evenly apart and secure them to each other using metal plates.
Step 7: Install Bracing
To ensure that the trusses are secure and stable, bracing must install. Bracing is typically install diagonally between the trusses and helps to distribute the weight of the roof evenly.
To install bracing, measure and cut the pieces to the correct length. Using wood screws, attach the bracing to the trusses at a 45-degree angle. Repeat this process for each truss.
Step 8: Install Roofing Material
Once the trusses and bracing are in place, you can install your roofing material. This can be done using traditional roofing techniques such as shingling, tiling, or metal roofing.
Conclusion
Installing a mini-beam truss can be a challenging project, but with the right tools and techniques, it can be done successfully. It’s important to follow all safety precautions when working at heights and to have a second person assist you in lifting the truss into place.
If you’re not comfortable with DIY projects, it’s best to hire a professional contractor to install the mini-beam truss for you. They will have the experience and knowledge to ensure that the truss is installed correctly and safely.