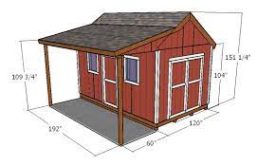
Installing a shed with an awning can provide you with extra storage space as well as a comfortable outdoor area for relaxing or entertaining. Here are the steps you need to follow to install a shed with an awning.
Choose a Location
The first step in installing a shed with an awning is to choose a location. You want to make sure that the location is level, with good drainage, and away from any trees or other obstacles that could interfere with the installation process. Additionally, make sure that the location is accessible and convenient for you to use.
Prepare the Site
Once you have chosen a location, you need to prepare the site for installation. Start by marking out the area where you want to install the shed and awning, using stakes and string. Then, remove any grass or other vegetation from the site, and use a shovel or excavator to level the ground. Make sure that the ground is level and firm, and that there is good drainage in the area.
Install the Shed
Next, it’s time to install the shed. Start by laying out the foundation for the shed, which could be a concrete slab or a foundation made of wood or metal. Make sure that the foundation is level and square, and that it is secured firmly to the ground.
Then, begin assembling the shed according to the manufacturer’s instructions. Typically, this involves assembling the walls, roof, and floor of the shed, and then securing them together with screws or bolts. Once the shed is fully assembled, use a level to ensure that it is sitting squarely on the foundation, and secure it in place with anchor bolts or concrete screws.
Install the Awning
Once the shed is installed, it’s time to install the awning. The awning will typically attach to the shed with a series of brackets, so start by installing these brackets according to the manufacturer’s instructions. Make sure that the brackets are securely attached to the shed and that they are level.
Next, assemble the awning according to the manufacturer’s instructions. This may involve attaching the awning fabric to the frame, and then installing the frame onto the brackets. Make sure that the awning is level and that it is securely attached to the brackets.
Finish the Installation
Finally, it’s time to finish the installation. This may involve adding finishing touches such as trim or paint to the shed and awning. As well as installing any additional features such as lighting or storage shelves.
Make sure that you follow all safety guidelines during the installation process. And that you use the appropriate tools and equipment. If you are unsure about any aspect of the installation process, consult with a professional or seek help from a knowledgeable friend or family member.
In conclusion, installing a shed with an awning can be a great way to add extra storage space and outdoor living space to your home. By following these steps, you can install a shed with an awning that is functional, attractive, and durable.

