")
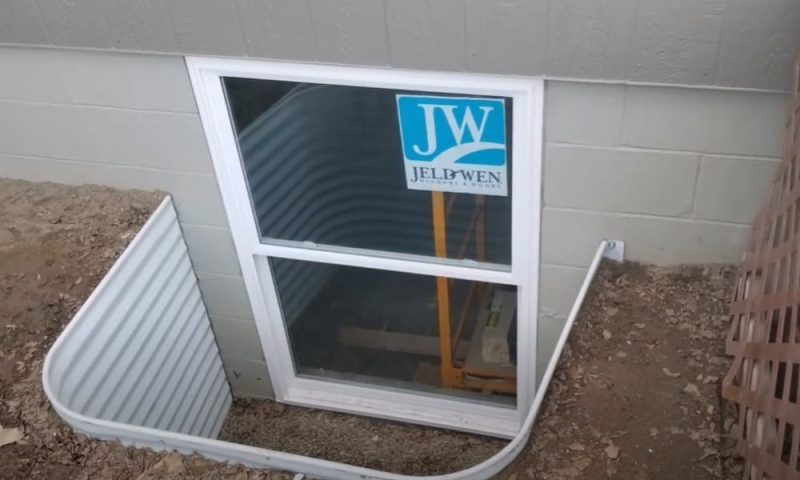
Installing a window well is an important part of any basement renovation or finishing project, as it helps to prevent water damage and improve the safety and functionality of your basement windows. Window wells are typically constructed from materials such as metal or concrete, and are designed to prevent water from seeping into your basement windows by creating a barrier between the window and the surrounding soil.
If you are planning to install a window well, there are a few key steps that you will need to follow in order to ensure that the project is completed safely and effectively. These steps include choosing the right location for the window well, measuring and excavating the area, installing the window well liner, and finishing the installation with drainage and landscaping.
Step 1: Choose the Right Location for the Window Well
The first step in installing a window well is to choose the right location for the well. This will typically involve selecting an area . That is close to an existing basement window and ensuring . That the location is clear of any obstructions such as utility lines or tree roots. You will also need to ensure that the location is not prone to flooding or other water-related issues, as this can compromise the effectiveness of the window well.
Step 2: Measure and Excavate the Area
Once you have selected the location for the window well, the next step is to measure and excavate the area. This will typically involve digging a hole that is deep enough to accommodate the window well liner, and wide enough to allow for proper drainage and ventilation. You may also need to remove any debris or obstructions from the area, such as rocks or tree roots, in order to ensure. That window well is install securely and effectively.
Step 3: Install the Window Well Liner
The next step in installing a window well is to install the window well liner. This is typically made from materials . .Such as metal or concrete and is design to provide a sturdy and waterproof barrier. The window and the surrounding soil. You will need to carefully measure and cut the liner to fit the dimensions of your window well and ensure. That it is installed securely and level.
Step 4: Finish the Installation with Drainage and Landscaping
Once the window well liner is installed. The final step in the process is to finish the installation with drainage and landscaping. This will typically involve installing a drainage system around . The perimeter of the window well, in order to direct water away from the well and prevent. It from seeping into the surrounding soil. You may also need to add soil, mulch, or other landscaping features around. The window will in order to improve its appearance and functionality.
Overall, installing a window well is a relatively straightforward process. That can help to prevent water damage and improve the safety and functionality of your basement windows. By following these key steps and ensuring. That the window well is installed securely and effectively, you can enjoy a dry, safe, and functional basement that meets all of your needs and requirements.