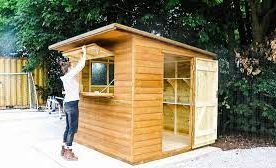
A wooden shed bar is a great addition to any backyard. It provides a place to relax and enjoy a drink with friends and family, without having to go inside. Building a shed bar can be a fun DIY project, but it does require some planning and preparation. Here’s a step-by-step guide on how to install a wooden shed bar.
Choose the Location
The first step in building a shed bar is to choose the location. Consider the size of your backyard, the layout of your landscape, and how much space you have available. You’ll want to choose a location that is flat and level, and that is easily accessible from your home.
Build the Foundation
Once you have chosen the location for your shed bar, it’s time to build the foundation. The foundation should be made of either concrete or gravel, and should be level and stable. If you are using concrete, you will need to pour a concrete slab that is at least four inches thick. If you are using gravel, you will need to dig a trench that is six inches deep, and fill it with gravel.
Construct the Frame
Next, you’ll need to construct the frame of your shed bar. You can use either pre-made shed bar kits, or build it from scratch. If you are building it from scratch, you will need to use pressure-treated lumber for the frame, as it will be exposed to the elements. Use a circular saw or miter saw to cut the lumber to the appropriate lengths, and use a power drill to secure the frame together with screws.
Install the Walls and Roof
Once the frame is complete, it’s time to install the walls and roof. Use plywood sheets for the walls, and either asphalt shingles or metal roofing for the roof. If you are using shingles, you will need to use roofing felt as an underlayment. Use a nail gun to attach the walls and roof to the frame.
Install the Windows and Doors
Next, it’s time to install the windows and doors. You can use pre-made windows and doors, or build them from scratch. If you are building them from scratch, use pressure-treated lumber for the frames, and acrylic or tempered glass for the windows. Use a power drill to attach the windows and doors to the shed bar.
Install the Electrical Wiring
If you want to install electricity in your shed bar, now is the time to do it. You will need to run electrical wires from your home to the shed bar, and install outlets, light fixtures, and switches. If you are not experienced with electrical work, it is recommended that you hire a licensed electrician to do the job for you.
Finish the Interior
Once the electrical work is complete, it’s time to finish the interior of your shed bar. Install insulation in the walls and ceiling to keep the space warm in the winter and cool in the summer. You can use drywall, wood paneling, or shiplap to cover the walls and ceiling. Install flooring, such as laminate or tile, and add finishing touches like baseboards and trim.
Build the Bar
The final step in building your shed bar is to build the bar itself. You can either build it from scratch, or purchase a pre-made bar kit. If you are building it from scratch, use pressure-treated lumber for the frame, and use a circular saw or miter saw to cut the lumber to the appropriate lengths. Use a power drill to secure the frame together with screws, and add a countertop made of either wood or stone.
Install the Plumbing
If you want to install a sink in your shed bar, now is the time to do it. You will need to run plumbing pipes from your home to the shed bar, and install a sink and faucet. If you are not experienced with plumbing work, it is recommended that you hire a licensed plumber to do the job for you.
Add Finishing Touches
Once the bar and plumbing are complete, it’s time to add finishing touches to your shed bar. Install shelving, cabinets, and a mini-fridge to store drinks and snacks. Add bar stools or chairs for seating, and decorate the space with artwork, signs, and other decorative items.
In conclusion, building a wooden shed bar is a fun and rewarding DIY project. By following these steps, you can create a cozy and inviting space in your backyard where you can relax and entertain guests. Just be sure to take your time, and use high-quality materials to ensure that your shed bar is sturdy and durable. With a little effort and creativity, you can have the backyard oasis of your dreams.

