")
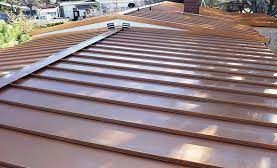
Copper penny metal roofing is a popular choice for homeowners who want a durable, attractive, and low-maintenance roofing option. Installing copper penny metal roofing requires some skill and knowledge, but with the right tools and steps, you can do it yourself. Here is a step-by-step guide on how to install copper penny metal roofing.
Measure the Roof
Before installing the copper penny metal roofing, you’ll need to measure the roof to determine how much material you need. Measure the length and width of the roof, and then multiply the two measurements to get the square footage of the roof. Add 10% to the total to account for waste and overlap.
Choose the Materials
There are several materials you’ll need to install copper penny metal roofing, including metal roofing panels, underlayment, ridge caps, flashing, screws, and sealant. Choose high-quality materials that are designed for use with copper penny metal roofing.
Prepare the Roof
Before installing the metal roofing panels, you’ll need to prepare the roof. Start by installing the underlayment, which is a waterproof barrier that goes underneath the metal panels. The underlayment helps to protect the roof from moisture and prevent leaks. Install the underlayment according to the manufacturer’s instructions, making sure to overlap each sheet by at least six inches.
Install the Flashing
Next, install the flashing around the edges of the roof and any other areas where the metal panels will meet other materials, such as chimneys or skylights. Flashing helps to prevent water from seeping in through the gaps between the metal panels and other materials. Use screws and sealant to attach the flashing to the roof.
Install the Metal Panels
Once the underlayment and flashing are in place, you can begin installing the copper penny metal roof panels. Start at the bottom of the roof and work your way up, overlapping each panel by at least one inch. Use screws and sealant to attach the panels to the roof, making sure to follow the manufacturer’s instructions.
Cut the Metal Panels
If you need to cut the metal panels to fit around chimneys, skylights, or other obstacles, use metal cutting tools such as snips or a circular saw with a metal-cutting blade. Make sure to wear safety goggles and gloves when cutting the metal.
Install Ridge Caps
Once the metal panels are installed, you’ll need to install the ridge caps, which go along the peak of the roof to help seal the panels and prevent water from seeping in. Ridge caps are typically made of the same material as the metal panels and are designed to match the profile of the panels. Use screws and sealant to attach the ridge caps to the roof.
Inspect and Clean the Roof
After the copper penny metal roofing is installed, inspect the roof to make sure there are no gaps or leaks. Use a hose to test the roof for leaks by spraying water on it and checking for any signs of water seeping through. If you find any leaks, use sealant to fix them.
Finally, clean the roof to remove any debris or dirt. You can use a broom or a leaf blower to remove debris, and a mild detergent and water to clean the metal panels. Avoid using harsh chemicals or abrasive cleaners that could damage the metal.
In conclusion, installing copper penny metal roofing requires some skill and knowledge, but with the right tools and steps, you can do it yourself. Measure the roof, choose high-quality materials, prepare the roof, install the flashing and metal panels, cut the panels as needed, install the ridge caps, inspect and clean the roof, and enjoy your beautiful and durable copper penny metal roofing.