")
Installing decorative ceiling tiles can dramatically transform the look of any room, adding elegance and character. Whether you’re aiming to enhance the aesthetic of your home or office, this DIY project is manageable and rewarding. Here’s a comprehensive step-by-step guide to help you install decorative ceiling tiles successfully.
Step 1: Choose the Right Tiles
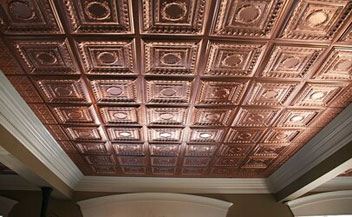
Before you begin, select the appropriate type of ceiling tiles for your space. Consider materials like tin, copper, faux tin, or even plastic, depending on your budget and the room’s decor. Each material has its own installation requirements and aesthetic appeal.
Step 2: Gather Your Tools and Materials
You will need the following tools and materials:
- Decorative ceiling tiles
- Measuring tape
- Chalk line or laser level
- Utility knife (for plastic tiles) or tin snips (for metal tiles)
- Adhesive (consult your tile manufacturer for the best type)
- Caulking gun
- Putty knife
- Safety glasses and gloves
Step 3: Prepare the Surface
Ensure the ceiling surface is clean, dry, and smooth. Remove any peeling paint or wallpaper. If the ceiling is not flat, consider installing a plywood substrate over it for a smoother base.
Step 4: Measure and Mark the Ceiling
Measure the ceiling and find the center. Use a chalk line or laser level to mark guidelines from the center to ensure your tile rows remain straight. This step is crucial for achieving a professional-looking finish.
Step 5: Apply Adhesive
If you’re using glue-up tiles, apply adhesive to the back of the tile using a caulking gun. Spread it with a putty knife to cover the entire back surface lightly. For drop-in tiles in a suspended grid system.
Step 6: Install the Tiles
Start from the center of the ceiling and press the first tile into place firmly. Make sure it aligns with your guidelines. Continue installing tiles outward from the center, ensuring each tile is butted snugly against its neighbors without gaps.
Step 7: Cutting Tiles to Fit
When you reach the perimeter of the room, you may need to cut tiles to fit. Measure the gap, mark your tile, and cut it using a utility knife (for plastic) or tin snips (for metal). Be sure to wear safety glasses to protect your eyes from any flying debris.
Step 8: Apply Finishing Touches
Once all the tiles are installed, inspect for any gaps or uneven edges. Use caulk to fill in any seams between the tiles, smoothing it out with a putty knife. This will give your ceiling a seamless look.
Step 9: Clean Up
Remove any excess adhesive or caulk with a damp cloth. Take a step back and admire your work—your space should now look transformed with the addition of your new decorative ceiling tiles.
Maintenance Tips
To keep your ceiling tiles looking their best, dust them regularly and clean them with appropriate cleaners depending on the material type. For metal tiles, avoid harsh chemicals that can corrode or tarnish the finish.
By following these steps, you can successfully install decorative ceiling tiles and create a stunning visual impact in your room. This project not only enhances the aesthetic appeal but also adds to the value of your property. Enjoy your new, stylish ceiling!