")
When you want stunning, durable, and long-lasting floors, epoxy flooring is your ultimate solution. Imagine walking into your garage or workspace and being greeted by a glossy, seamless floor that’s not just beautiful to look at but also incredibly tough. Whether you’re aiming to enhance functionality, aesthetics, or both, epoxy flooring has got your back. Let’s explore why this option is perfect for countless spaces and needs.
What’s All the Fuss About Epoxy Flooring?
Alright, so what’s the big deal with epoxy flooring? It’s a type of floor coating made by combining hardeners with resins. When mixed, they form a tough, plastic-like material that sticks to your floor, creating a shiny, strong, and smooth surface. Once applied, these floors resist cracks, stains, and wear better than almost any other flooring system.
Whether you’re considering it for your garage, home, or industrial space, epoxy flooring is like a superhero in the flooring world. Need a floor that looks great, lasts decades, and protects what’s underneath? This is the choice for you.
Why Choose Epoxy Flooring?
Here’s why people rave about epoxy floors:
- Durability that stands the test of time. Epoxy floors are built tough, so they won’t crack under pressure. They’re perfect for everything from garages to factories, supporting heavy machinery or cars with ease.
- Chemical resistance. Spill oil or chemicals? No problem! With epoxy resin for floors, cleaning becomes a breeze. These floors keep your workspace clean and protected.
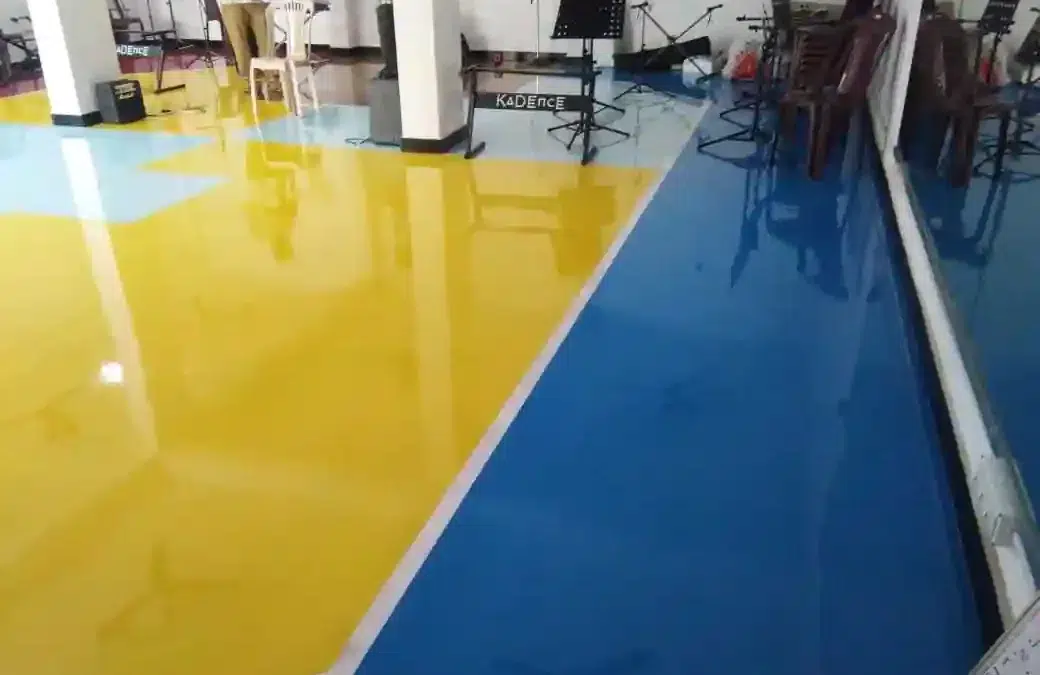
- Aesthetic appeal. Want a glossy surface so shiny it feels like you could see yourself in it? The glossy finish of an epoxy resin floor is a winner.
- Protective coatings and corrosion resistance. When applied properly over surfaces like steel structures, an epoxy coating provides serious corrosion protection and shields heavy-duty areas.
Perfect for Multiple Settings
While garages are hugely popular for epoxy garage floor paint, did you know epoxy also dreams big? It thrives in industrial applications, including warehouses, manufacturing units, and even showrooms. Its heavy machinery protection makes it ideal for smoothing out those workplace floors that suffer from constant abuse.
If you’re looking for an option for commercial kitchens or chemical plants, chemical-resistant coatings make epoxy a leader in safety and practicality. The added heat-resistant coatings make it perfect for hot environments like bakeries or industrial settings.
For outdoor projects, looking into polyurea coating versions of epoxy ensures outdoor durability. Whether it’s your patio, deck, or driveway, frequent weather changes won’t weaken its look or strength.
What Makes Epoxy Flooring Special?
Here’s why epoxy stands out compared to traditional floors:
- It’s seamless! No cracks or crevices mean no dirt hiding in hard-to-reach spots.
- There’s almost no limit to custom color options, so you can pick the design that suits your space.
- Trying to protect your equipment? Its adhesion properties cover floors and safeguard machinery against wear and tear.
- It’s not just for function. It also brings glamour! Perfect for creating your dream kitchen, gym floor, or man cave.
Preparation Matters
Before you apply epoxy floor paint, good surface preparation is essential. Cleaning and sometimes even adding a previous heavy-duty primer to the surface ensures that the epoxy resin floor paint will stick properly. Without this step, the coating could peel off sooner than expected. Trust us, taking time to prepare well makes everything better in the long run.
Home Applications
Does your garage floor have cracks, oil stains, or a general “meh” vibe? Garage floor epoxy could bring new life to it! From epoxy paint garage floor options to plenty of epoxy garage floor coating styles, the possibilities are endless. Plus, choosing something like epoxy resin garage floor paint ensures a low-maintenance, bold look that screams sophistication.
If you’ve been thinking about painting your garage floor with epoxy paint, we’ve got great news. It’s not as complicated as it looks! Brands like epoxy floor paint Screwfix make the tools accessible, allowing homeowners to take on DIY projects comfortably.
And what about spills and kids? Life happens, but epoxy resin floor coverings add an easy-clean layer to reduce frustration.
Loving Your New Floors
A standout benefit of epoxy floors is how little maintenance they require. Most spills can be handled with a quick wipe, and the smooth, water-resistant layer resists moisture naturally. For places prone to flooding, waterproofing solutions are essential, and that’s yet another win for epoxy floor coatings.
If you’re dealing with older epoxy needing a refresh, a quick repaint epoxy garage floor process can bring back the shine. Epoxy often doesn’t need an outright replacement; a little TLC can go a long way!
Beyond Floors
While we’ve talked a lot about floors’ durability and beauty, don’t forget that epoxy works on more than just horizontal surfaces. Need bridge coatings or chemical plant coatings? Epoxy industrial coatings paired with zinc-rich primer coatings ensure that these structures stay rust-free, durable, and weatherproof.
Industries increasingly count on protective paint systems for their equipment and infrastructure. That includes ship hulls, storage tanks, and pipelines.
Eco-Friendly Options Are Here!
Some formulations today, like water-based paints, reflect a growing demand for sustainable solutions. With strong environmental compliance standards, epoxy systems ensure both performance and sustainability, so you’re protecting the planet too.
Quick Tips to Get the Best Results
If you’re applying garage floor treatment epoxy yourself, here are some things to keep in mind:
- Clean, clean, clean! A spotless starting surface is key.
- Use a high solids epoxy for better coverage and durability.
- Allow drying time. Some formulas are quick-drying paint, but make sure they’re cured properly before heavy usage.
By following these steps, you’ll ensure a smooth process with outstanding results.
Say Goodbye to Flooring Woes
Epoxy flooring near me is more than just a search term; it represents your next step to transforming your space. Whether you’re redesigning your garage, warehouse, bridge, or kitchen floor, epoxy flooring offers unmatched benefits. From industrial coatings to alkyd coatings and creative finishes, epoxy has redefined what it means to have floors that both impress and endure.
With its custom coatings suited for every need, you can truly make any floor your own. Hard to argue with having a masterpiece right under your feet, isn’t it?
Want to bring this magic to your place? Head to your local floor epoxy company and grab your very own floor paint epoxy today. floor that adds value to your space.