")
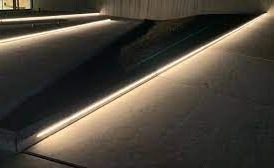
LED lights are an excellent way to add a modern touch to any space. They are energy-efficient, long-lasting, and can be installed in a variety of surfaces, including concrete. In this guide, we will walk you through the steps of installing LED lights in concrete.
Choose the Right Type of LED Lights
Before you start installing LED lights in concrete, you need to select the right type of lights. LED lights come in various shapes and sizes, and you need to select the right one based on the application. For example, if you want to install lights in your patio or walkway, you can choose strip lights, while if you want to illuminate a specific area, you can choose recessed lights. Moreover, you need to select the right color temperature based on your preference and the ambiance you want to create.
Measure and Mark the Area
Once you have chosen the right LED lights, you need to measure and mark the area where you want to install them. You can use a chalk line to mark the area or a straight edge to ensure that the markings are straight and level. Moreover, you need to ensure that the area is clean and free of debris, so the LED lights can adhere correctly to the surface.
Prepare the Surface
Before installing LED lights in concrete, you need to prepare the surface by applying a concrete primer. The primer will ensure that the surface is clean and free of any dirt or debris. Moreover, it will also improve the adhesion of the LED lights to the concrete. You can use a roller or brush to apply the primer, and it should be allowed to dry for at least 24 hours.
Install the LED Lights
Once the primer has dried, you can start installing the LED lights in the marked area. The LED lights come with adhesive backing, which makes it easy to install them on any surface. However, you need to ensure that the lights are installed straight and level. You can use a spirit level to ensure that the lights are level, and you can adjust them as required.
Connect the Wiring
After installing the LED lights, you need to connect the wiring. You can use waterproof connectors to connect the wires, and you need to ensure that they are properly connected. Moreover, you need to ensure that the wiring is protected from the elements, so you should use a conduit to protect it.
Seal the Edges
To ensure that the LED lights are protected from the elements, you need to seal the edges. You can use a silicone sealant to seal the edges around the LED lights. Moreover, you need to ensure that the sealant is applied evenly and covers the entire area.
Test the Lights
After installing and sealing the LED lights, you need to test them to ensure that they are working correctly. You can switch them on and off to ensure that they are working correctly, and you need to ensure that the wiring is correctly connected. Moreover, you need to ensure that the lights are adequately protected from the elements.
In conclusion, installing LED lights in concrete is an excellent way to add a modern touch to any space. However, you need to ensure that you choose the right type of LED lights and prepare the surface correctly before installation. Moreover, you need to ensure that the wiring is correctly connected and protected from the elements. By following these steps, you can transform any space with LED lights in concrete.