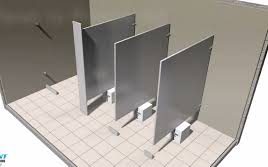
Installing stainless steel bathroom walls is a durable and stylish option that can enhance the aesthetics and functionality of your bathroom. Stainless steel walls are resistant to moisture, corrosion, and staining, making them an ideal choice for wet areas. In this step-by-step guide, we will walk you through the process of installing stainless steel bathroom walls:
Gather the necessary tools and materials:
Before you begin, gather the following tools and materials:
- Stainless steel wall panels
- Measuring tape
- Level
- Adhesive (recommended for stainless steel)
- Notched trowel
- Jigsaw or metal cutting tool
- Construction adhesive
- Screws and anchors
- Caulk gun
- Silicone caulk (waterproof)
Measure and prepare the walls:
Measure the height and width of each wall where you plan to install the stainless steel panels. Mark the measurements on the panels and use a jigsaw or metal cutting tool to cut them to the appropriate size. Take into account any cutouts for electrical outlets or fixtures.
Prepare the wall surface:
Ensure that the wall surface is clean, smooth, and free of any debris or imperfections. Remove any existing wallpaper, paint, or tiles. Repair any cracks or holes in the walls and sand them smooth. Clean the walls thoroughly to ensure proper adhesion of the stainless steel panels.
Apply adhesive:
Apply a construction adhesive or recommended adhesive for stainless steel to the back of the stainless steel panel using a notched trowel. Ensure that the adhesive is spread evenly across the panel surface.
Position and secure the panels:
Carefully position the first panel onto the wall, starting from the bottom. Use a level to ensure that the panel is straight and plumb. Press the panel firmly against the wall to secure it in place. Use screws and anchors to secure the panel at the top and sides, ensuring that they are evenly spaced. Repeat this process for each panel, ensuring that they are properly aligned and fitted together.
Cutouts for outlets and fixtures:
For electrical outlets or fixtures, mark the panel with the appropriate measurements and use a jigsaw or metal cutting tool to create the necessary cutouts. Ensure that the cutouts are precise and align with the outlets or fixtures.
Install corner trim:
To provide a finished look and additional protection, install corner trim along the edges of the stainless steel panels. Use construction adhesive to attach the trim pieces securely. Cut the trim to the appropriate length and angle for each corner.
Caulk and seal the edges:
Once all the panels and trim are installed, use silicone caulk to seal the edges and joints between the stainless steel panels and the walls. Apply a thin bead of caulk along the edges and smooth it with a caulk smoothing tool or your finger. Ensure that the caulk is fully cured before exposing it to water or moisture.
Finishing touches:
Clean the stainless steel panels with a mild cleaner and a soft cloth to remove any adhesive residue or fingerprints. Inspect the installation for any gaps or areas that require touch-ups. Make any necessary adjustments or caulking to ensure a seamless and waterproof installation.
By following this step-by-step guide, you can successfully install stainless steel bathroom walls in your space. Enjoy the sleek and modern look of stainless steel, along with its durability and resistance to moisture. Proper installation and maintenance will ensure that your stainless steel walls last for years to come, providing a functional and stylish bathroom environment.

