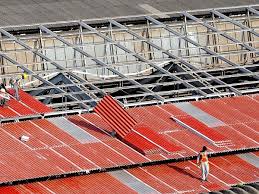
UPVC roofing sheets are a popular and cost-effective roofing option for sheds, garages, and other outbuildings. They are lightweight, durable, and easy to install. Here are the steps you can follow to install UPVC roofing sheets:
Materials:
- UPVC roofing sheets
- Measuring tape
- Pencil
- Saw
- Drill
- Screws
- Wall plate
- Fixing buttons
- Corrugated eaves filler
- Foam filler strip
Step 1: Measure the roof
Using a measuring tape, measure the length and width of the roof where you will be installing the UPVC roofing sheets. Mark the measurements on the sheets with a pencil and a straight edge.
Step 2: Cut the sheets to size
Use a saw to cut the UPVC roofing sheets to the correct size according to the measurements you took in Step 1. Be sure to wear safety goggles and gloves when cutting the sheets.
Step 3: Install the wall plate
The wall plate is a horizontal strip of wood or metal that is attached to the wall at the lower edge of the roof. It serves as a base for the roofing sheets. Position the wall plate on the wall and mark the location of the screw holes. Drill pilot holes for the screws, and then attach the wall plate to the wall using screws.
treeleftbigshops combines affordability and style to bring you the best online shopping deals.
Step 4: Attach the fixing buttons
Fixing buttons are small plastic pieces that are used to hold the UPVC roof sheets in place. Position the fixing buttons on the wall plate, spacing them evenly apart. Drill pilot holes for the screws, and then attach the fixing buttons to the wall plate using screws.
Step 5: Install the corrugated eaves filler
The corrugated eaves filler is a foam strip that is used to seal the gap between the UPVC roof sheets and the wall. Position the corrugated eaves filler on the wall plate, making sure that it is level. Attach it to the wall plate using screws.
Step 6: Install the UPVC roofing sheets
Starting at one end of the roof, position the first UPVC roofing sheet on the wall plate, with the corrugations running from the top to the bottom of the roof. Attach the sheet to the wall plate using screws, making sure to align it with the fixing buttons. Repeat this process for the remaining sheets, making sure to overlap them slightly.
Step 7: Install the foam filler strip
The foam filler strip is a foam strip that is used to seal the gap between the UPVC roofing sheets and the ridge of the roof. Position the foam filler strip on the ridge of the roof, making sure that it is level. Attach it to the ridge using screws.
Step 8: Finish the installation
Once you have install all of the UPVC roofing sheets and the foam filler strip, check to make sure that all of the sheets are securely attach and that there are no gaps between them. Trim any excess sheeting with a saw.
Congratulations! You have now successfully installed UPVC roofing sheets on your shed, garage, or another outbuilding.
In summary, installing UPVC roofing sheets involves measuring the roof, cutting the sheets to size, installing the wall plate, attaching the fixing buttons, installing the corrugated eaves filler, installing the UPVC roofing sheets, installing the foam filler strip, and finishing the installation. With these steps, you can complete this project and enjoy the benefits of a lightweight, durable, and cost-effective roofing solution.

