")
Garden railway track bed construction is an important part of building a functional and aesthetically pleasing garden railway. A well-constructed track bed will provide a stable foundation for your tracks, prevent erosion, and enhance the overall appearance of your railway. In this guide, we will walk you through the steps of preparing for garden railway track bed construction.
Step 1: Determine the Location
The first step in preparing for garden railway track bed construction is to determine the location of your railway. Consider factors such as sunlight exposure, drainage, and accessibility when choosing the location for your railway. Also, consider any existing landscaping features that you want to incorporate into your railway.
Step 2: Clear the Site
Once you have chosen the location for your garden railway, the next step is to clear the site. Remove any debris or obstructions, such as rocks, roots, or vegetation, from the area where the track bed will be constructed. This will ensure that the foundation is stable and level.
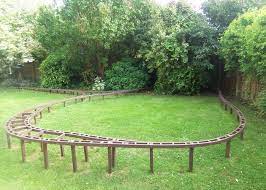
Step 3: Determine the Shape and Size of the Track Bed
The next step is to determine the shape and size of the track bed. Consider the size of your trains and the curvature of the tracks when choosing the shape and size of the track bed. Use a garden hose or string to outline the shape and size of the track bed.
Step 4: Excavate the Site
Once you have determined the shape and size of the track bed, the next step is to excavate the site. Dig a trench along the outline of the track bed, making sure that the trench is deep enough to accommodate the thickness of the track bed materials. Remove any excess soil from the trench.
Step 5: Level the Site
After excavating the site, the next step is to level the site. Use a spirit level to ensure that the bottom of the trench is level. If the site is not level, use a shovel or rake to fill in any low spots or remove any high spots.
Step 6: Lay the Geotextile Fabric
Once the site is level, the next step is to lay the geotextile fabric. Geotextile fabric is a permeable material that helps to prevent erosion and stabilize the soil. Lay the fabric over the bottom of the trench, making sure that it covers the entire area where the track bed will be constructed.
Step 7: Add the Track Bed Materials
After laying the geotextile fabric, the next step is to add the track bed materials. There are several materials that can be used for track bed construction, including gravel, crushed stone, and ballast. Choose the material that best suits your needs and budget.
Spread the track bed material evenly over the geotextile fabric, making sure that it is level and compacted. Use a compactor or hand tamper to compact the material, ensuring that it is stable and firm.
Step 8: Install the Railway Tracks
After the track bed materials have been added and compacted, the next step is to install the railway tracks. Lay the tracks on top of the track bed, making sure that they are securely fastened to the track bed. Use screws or nails to attach the tracks to the track bed.
Step 9: Test the Railway
After installing the railway tracks, the final step is to test the railway. Run your trains on the tracks and observe how they perform. Check to make sure that the tracks are level and secure, and that there are no dips or bumps in the track bed.
In conclusion, preparing for garden railway track bed construction is an important step in building a functional and visually appealing garden railway. A well-constructed track bed will provide a stable foundation for your tracks and prevent erosion. It is important to follow the steps carefully to ensure that the trackbed is properly constructed and will last for years to come. Additionally, proper preparation will ensure that the construction process goes smoothly and that you are able to enjoy your garden railway as soon as possible.