")
If the floor of your shed is rotting or has become damaged over time, it’s essential to replace it as soon as possible to avoid further damage to the shed and its contents. Here are the steps to follow to replace a floor in a shed:
Clear Out the Shed
Before you start replacing the floor, remove all the contents of the shed. This will give you more space to work and ensure that you don’t damage anything while working on the floor. It will also make it easier to access the existing floor and remove it.
Remove the Existing Floor
Carefully remove the existing floorboards from the shed. Depending on the type of shed and the condition of the floor, this may require some effort. If the floorboards are nailed down, use a pry bar or a hammer and chisel to remove them. If the floorboards are screwed in place, use a drill to remove the screws.
Inspect the Underlying Structure
Once you’ve removed the floorboards, inspect the underlying structure to make sure it’s in good condition. Check for any signs of rot, insect damage, or other issues that could compromise the stability of the shed. If you notice any problems, address them before installing the new floor.
Measure and Cut the New Floorboards
Measure the size of the shed floor and cut the new floorboards to fit. Use a circular saw or a handsaw to cut the boards to the appropriate size. Make sure to leave a small gap between each board to allow for expansion and contraction due to changes in temperature and humidity.
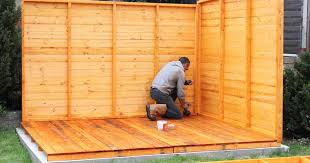
Install the New Floorboards
Start installing the new floorboards at one end of the shed and work your way towards the other end. Use a nail gun or a hammer and nails to secure each board to the underlying structure. Make sure to drive the nails in at an angle to prevent them from pulling out over time.
Seal the Gaps
After you’ve installed all the new floorboards, seal the gaps between them with a waterproof sealant. This will help to prevent water from seeping through the gaps and damaging the underlying structure. You can use a caulking gun to apply the sealant to the gaps.
Finish the New Floor
Once the sealant has dried, you can finish the new floor as desired. You can stain or paint the floorboards, or you can leave them unfinished if you prefer a more rustic look. If you’re planning to use the shed as a workspace, you may want to add a layer of polyurethane to protect the floor from damage.
Replace the Contents
After the new floor has been installed and finished, you can replace the contents of the shed. Make sure to place heavy items on the new floor with care to avoid damaging it. If possible, use a dolly or handcart to move heavy items to prevent scratches or gouges in the new floor.
Tips for Replacing a Floor in a Shed:
Wear Protective Gear
When replacing the floor in a shed, it’s important to wear protective gear, such as safety glasses, gloves, and a dust mask. This will help to prevent injuries and protect you from dust and debris that may be present.
Check Local Building Codes
Before replacing the floor in your shed, check local building codes to ensure that you comply with any regulations or requirements that may apply. You may need to obtain a permit or follow specific guidelines for the type of shed and the materials used in the floor.
Use High-Quality Materials
When replacing the floor in a shed, use high-quality materials that are designed to withstand wear and tear, moisture, and temperature changes. This will help to ensure that the new floor lasts for many years and requires minimal maintenance.
Seek Professional Help
If you’re not comfortable replacing the floor yourself or if you encounter any issues during the process, consider seeking professional help. A contractor or handyman with experience in shed construction can help you replace the floor and ensure that it’s done correctly. While this may cost more than doing it yourself, it can save you time and potentially prevent costly mistakes.
Consider Upgrading the Underlying Structure
If the underlying structure of your shed is in poor condition, consider upgrading it when replacing the floor. This can help to improve the stability and durability of the shed and prevent future issues with the floor. You may want to consult with a professional to determine the best approach for upgrading the underlying structure.
In conclusion, replacing the floor in a shed may seem like a daunting task, but it’s a manageable DIY project that can be completed with some basic tools and materials. By following the steps outlined above, you can remove the old floor, install a new one, and finish it to your liking. Remember to take safety precautions, check local building codes, use high-quality materials, and consider seeking professional help if needed. With a new floor in place, your shed will be more stable, secure, and functional, and you can enjoy using it for many years to come.