")
Replacing roof tiles can be a daunting task for many homeowners, but it is an essential part of maintaining the integrity of your roof. In this article, we will provide a step-by-step guide on how to replace roof tiles.
Step 1: Safety First
Before starting any roofing project, it is important to take the necessary safety precautions. Wear appropriate clothing, such as non-slip shoes and a hard hat, and use a sturdy ladder to access the roof. If possible, have someone assist you in the project and never work on the roof alone.
Step 2: Identify the Damaged
Tiles The first step in replacing roof tiles is to identify the damaged tiles that need to be replaced. Walk around the roof and look for any cracked, broken, or missing tiles. It is important to replace damaged tiles as soon as possible to prevent further damage to the roof and potential leaks.
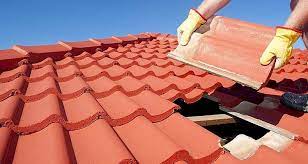
Step 3: Remove the Damaged Tiles
To remove the damaged tiles, use a flat pry bar or a specialized tile removal tool. Carefully insert the pry bar under the tile and lift it up gently to avoid damaging the surrounding tiles. Once the tile is loosened, slide it out from under the surrounding tiles.
Step 4: Clean the Area
Before installing the new tile, it is important to clean the area where the damaged tile was located. Remove any debris or dirt from the area, and ensure that the surface is clean and dry.
Step 5: Install the New Tile
To install the new tile, slide it into place under the surrounding tiles. Be sure to align the new tile with the existing tiles to maintain a consistent pattern. Gently press down on the tile to ensure that it is secure.
Step 6: Secure the Tile
To secure the new tile in place, use roofing nails or screws. Insert the nails or screws into the pre-drilled holes in the tile, and ensure that they are driven in securely without overdriving and damaging the tile. Be sure to use the appropriate type and size of nails or screws for your specific roof and tile type.
Step 7: Seal the Tile
To prevent water from leaking through the roof, it is important to seal the new tile in place. Apply roofing cement or silicone sealant to the edges of the tile and the surrounding tiles. Use a putty knife or trowel to spread the sealant evenly, and ensure that it covers the entire edge of the tile.
Step 8: Replace the Surrounding Tiles
If the damaged tile is located near the edge of the roof or in a visible area, it may be necessary to replace the surrounding tiles to maintain a consistent pattern. Follow the same steps outlined above to remove and replace the surrounding tiles.
Step 9: Inspect the Roof
Once the new tiles are installed and sealed, inspect the roof to ensure that all tiles are secure and there are no signs of damage or leaks. It is important to address any issues as soon as possible to prevent further damage to the roof.
In conclusion, replacing roof tiles may seem like a daunting task, but it is an essential part of maintaining the integrity of your roof. By following these simple steps, you can replace damaged tiles and ensure that your roof is secure and leak-free. Remember to take the necessary safety precautions, and if you are unsure about any aspect of the project, consult a professional roofer for assistance.