")
Installing metal siding over plywood is a great way to add durability and protection to your building’s exterior. Metal siding is popular due to its durability, low maintenance requirements, and modern aesthetic. This guide will provide a step-by-step process for installing metal siding over plywood.
Before starting the installation process, it is important to ensure that the plywood is in good condition. Any damaged or rotted areas should be replaced before installing the metal siding. Additionally, the plywood should be clean and free of debris.
Materials:
Metal siding panels
Trim pieces
Nails or screws
J-channel
Sealant
Tape measure
Level
Chalk line
Circular saw or metal shears
Drill
Hammer or impact driver
Snips
Ladder or scaffolding
Safety equipment (gloves, safety glasses, etc.)
Step 1: Measure and plan
Before starting the installation, measure the area where the metal siding will be installed. This will help determine the amount of material needed. Next, plan the layout of the metal siding. Start at the bottom of the wall and work your way up, ensuring that the metal siding overlaps slightly. Use a chalk line to mark the top edge of the first row of metal siding.
Step 2: Install the J-channel
The J-channel is a piece of trim that is installed along the bottom edge of the wall. It creates a channel for the metal siding to sit in and provides support. Begin by installing the J-channel along the bottom edge of the wall, using nails or screws to secure it to the plywood. Make sure the J-channel is level and straight.
Step 3: Install the first row of metal siding
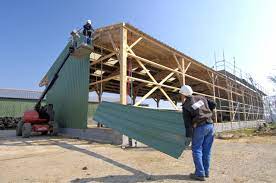
Starting at one end of the wall, place the first panel of metal siding into the J-channel. Make sure it is level and straight. Use a level to ensure that the panel is straight. Nail or screw the panel into place, using the pre-drilled holes in the metal siding. Continue installing the rest of the panels in the first row, making sure to overlap each panel slightly.
Step 4: Install the trim pieces
Trim pieces are installed at the corners of the building and where the metal siding meets other materials, such as windows or doors. Measure and cut the trim pieces to fit, using a circular saw or metal shears. Install the trim pieces using nails or screws.
Step 5: Install the remaining rows of metal siding
Starting at the bottom of the wall, install the remaining rows of metal siding. Overlap each panel slightly and nail or screw them into place. Make sure the panels are level and straight. Use snips to cut the metal siding to fit around windows or other obstacles.
Step 6: Install the top row of metal siding
The top row of metal siding is installed along the top edge of the wall. Measure and cut the panels to fit, ensuring that they overlap the top edge of the previous row of metal siding. Nail or screw the panels into place.
Step 7: Seal the seams
Sealing the seams between the metal siding panels is important to prevent water from getting behind the siding. Apply sealant to the seams between each panel, using a caulking gun. Smooth the sealant with a tool or your finger to ensure a tight seal.
Step 8: Inspect and clean up
Once the metal siding is install, inspect it to ensure that it is level and straight. Clean up any debris or excess sealant.
In conclusion, installing metal siding over plywood is a straightforward process that can completed with basic tools and materials. It is important to ensure that the plywood is in good condition and that the metal siding is install properly to prevent water from getting behind it. With proper installation, metal siding can provide durability, low maintenance requirements, and a modern aesthetic to your building’s exterior. Additionally, metal siding can be painted or finished to match the look of your building’s architecture and style.