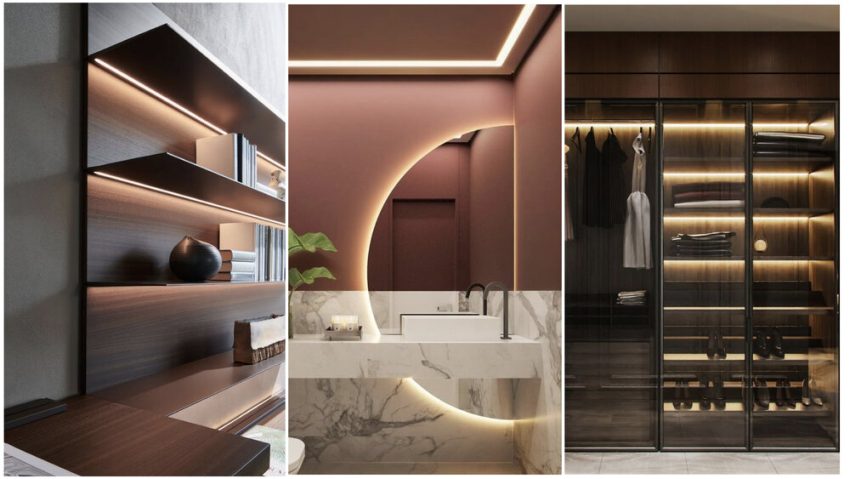
LED strip lights have become increasingly popular in recent years due to their versatility and energy efficiency. One creative use of LED strip lights is behind a mirror. This can add a stylish and functional touch to any bathroom or dressing room. Here’s what you need to know about installing LED strip lights behind a mirror.
Choose the right LED strip lights
When selecting LED strip lights for use behind a mirror, it’s important to choose ones that are suitable for damp environments. Bathroom mirrors are often exposed to steam and moisture, so using lights that aren’t rated for use in damp areas could be dangerous.
Look for LED strip lights that are rated for use in damp locations. These lights will be labeled as “IP44” or higher, which means they’re protected against splashing water.
You’ll also want to choose LED strip lights that are the right color temperature and brightness for your needs. Warm white (2700K-3000K) is a good choice for a cozy and inviting bathroom, while cool white (4000K-5000K) is better for a bright and energizing look. If you’re using the lights for makeup application or grooming, you may want to choose lights with a high color rendering index (CRI) of 90 or above, which will help ensure accurate color representation.
Measure and mark the mirror
Before installing the LED strip lights, you’ll need to measure and mark where you want them to go. Use a tape measure and a level to determine the placement of the lights. You can either run the lights along the edges of the mirror or create a pattern within the mirror itself.
Once you’ve determined the placement of the lights, mark the mirror with a pencil or masking tape. This will help ensure that the lights are installed in the right location.
Clean the surface
Before applying the LED strip lights, it’s important to clean the surface of the mirror. Use a clean cloth and a mild cleaning solution to remove any dirt, dust, or residue from the mirror. This will help ensure that the lights stick properly and last longer.
Install the lights
Once the surface is clean and dry, it’s time to install the LED strip lights. Start by removing the backing from the adhesive tape on the back of the lights. Carefully align the lights with the markings you made on the mirror and press them firmly into place.
If you need to make cuts in the lights to fit around corners or other obstacles, be sure to follow the manufacturer’s instructions for cutting the lights. Most LED lights can be cut to size with scissors or a utility knife.
Connect the lights
Once the LED strip lights are installed, it’s time to connect them to a power source. Most strip lights come with a power supply that plugs into a standard electrical outlet. Follow the manufacturer’s instructions for connecting the lights to the power supply.
Test the lights
Before you start using the LED strip lights, it’s important to test them to make sure they’re working properly. Turn on the power supply and check that all of the lights are illuminated. If any lights aren’t working, check the connections and make sure everything is properly plugged in.
Enjoy your new lighting
Once the strip lights install and working properly, it is time to enjoy your new lighting. Turn on the lights and see how they look. You may want to adjust the brightness or color temperature to suit your preferences.
Strip lights behind a mirror can add a stylish and functional touch to any bathroom or dressing room. With the right LED lights, careful installation, and proper maintenance, you can enjoy this lighting solution for years to come. And if you’re not comfortable installing the lights yourself, consider hiring a professional electrician or handyman to do the job for you.
Here are a few additional tips to keep in mind when using LED strip lights behind a mirror:
Use a dimmer switch: If you want to create a relaxing ambiance in your bathroom or dressing room, consider using a dimmer switch with your LED strip lights. This will allow you to adjust the brightness of the lights to suit your mood.
Consider adding a motion sensor: To save energy and make your bathroom or dressing room more convenient, you could consider adding a motion sensor to your LED lights. This would allow the lights to turn on automatically when you enter the room and turn off when you leave.
Use a remote control: Some LED lights come with a remote control that allows you to adjust the color temperature and brightness of the lights without having to get up from your seat. This can be a convenient feature if you like to change the lighting frequently.
Choose a waterproof power supply: Since LED strip behind a mirror are often expos to moisture and steam, it’s important to choose a power supply that is waterproof. Look for a power supply that is rat for use in damp locations.
Maintain your LED strip lights: To ensure that your LED lights last as long as possible, it’s important to maintain them properly. Clean the surface of the mirror regularly to remove any dirt or dust that could damage the lights, and check the connections periodically to make sure everything is properly plugg in.
In conclusion, LED lights behind a mirror can be a stylish and functional addition to any bathroom or dressing room. By choosing the right LED strip lights, carefully measuring and marking the mirror, and properly installing the lights, you can create a beautiful and energy-efficient lighting solution. And with proper maintenance, you can enjoy your LED lights for years to come.

