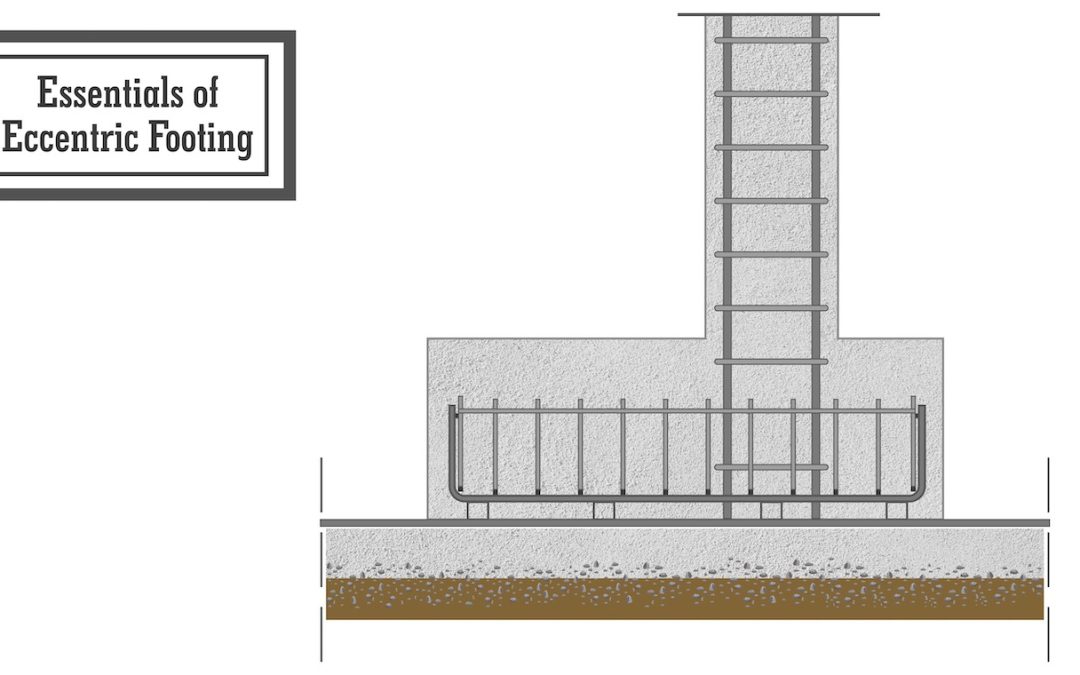
Eccentric footings are essential structural components used to support buildings and structures where the column load is not uniformly distributed. Mastering the art of creating accurate and detailed eccentric footing drawings is crucial for architects, engineers, and drafters to ensure the stability and integrity of a building’s foundation. This step-by-step guide will walk you through the process of creating precise eccentric footing drawings to meet industry standards.
Understanding the Design Requirements
Before you begin drawing, it’s essential to grasp the design requirements and specifications provided by the structural engineer. Familiarize yourself with the load-bearing capacity of the soil, column dimensions, and the eccentricity value, which determines the offset distance between the column’s center and the footing’s center.
Prepare the Drawing Tools
Gather the necessary drawing supplies, which could comprise a drawing board or computer-aided design (CAD) software, pencils, rulers, compasses, erasers, and any pertinent templates. For digital drafting, choose a CAD program that allows precise measurements and accurate scaling.
Set Up the Drawing Sheet
If using a physical drawing board, affix a clean and appropriately sized sheet of paper. For digital drafting, create a new drawing file with the correct units and scale.
Scale the Drawing
Choose the appropriate scale for your drawing, considering the building’s size and the available space on the drawing sheet. Commonly used scales in building plans include 1/4 inch to 1 foot (1:48) or 1/8 inch to 1 foot (1:96).
Draw the Base Dimension
Begin by drawing the base dimension of the eccentric footing according to the provided specifications. Use a ruler to draw straight lines, ensuring the measurements are correctly scaled.
Mark the Column Centerline
Find the center point of the column and draw a vertical line that runs through it. This line represents the column centerline and will help you accurately place the footing eccentricity.
Determine the Eccentricity
Measure the eccentricity value provided in the design specifications. From the column centerline, use a ruler to mark the distance corresponding to the eccentricity value. This point will represent the center of the eccentric footing.
Draw the Footing Outline
Using the eccentricity point as the center, sketch the outline of the eccentric footing. The footing’s size should match the base dimension you initially drew, but it will now be offset from the column center.
Add Dimensions and Labels
Include precise dimensions for the eccentric footing, indicating length, width, and eccentricity distance. Label the footing and column clearly for easy identification.
Provide Reinforcement Details
If specified in the design, add reinforcement details for the eccentric footing. Draw reinforcement bars and indicate their spacing, size, and cover distance.
Review and Double-Check
Thoroughly review the drawing for accuracy, proper scale, and adherence to the design requirements. Check all dimensions, labels, and reinforcement details to avoid errors.
Conclusion:
Mastering eccentric footing drawings is a valuable skill for professionals involved in the construction and design industry. By following this step-by-step guide, you can create precise and detailed eccentric footing drawings that contribute to the structural stability and integrity of a building’s foundation. Always ensure that your drawings comply with the provided design specifications and meet industry standards for optimal results.

