")
Painting a plastic shower can be a simple and affordable way to refresh the look of your bathroom. However, it’s important to use the right type of paint and follow the proper steps to ensure a successful and long-lasting result. In this article, we’ll go over the steps and materials needed to paint a plastic shower.
Materials Needed:
Plastic cleaner
Sandpaper (220 grit)
Tack cloth
Painters tape
Plastic primer
Paint (specifically designed for plastic surfaces)
Paintbrush or roller
Step 1: Clean the Shower
Before beginning the painting process, it’s important to thoroughly clean the shower to remove any dirt, grime, or soap scum that may be present. Use a plastic cleaner specifically designed for use on plastic surfaces, and follow the manufacturer’s instructions. Make sure to rinse the shower thoroughly and allow it to dry completely before moving on to the next step.
Step 2: Sand the Surface
Using 220 grit sandpaper, lightly sand the surface of the plastic shower. This will help the primer and paint adhere better to the surface. After sanding, use a tack cloth to remove any dust or debris from the surface.
Step 3: Tape Off the Area
Use painter’s tape to mask off any areas you do not want painted, such as the fixtures, handles, and edges of the shower. Make sure the tape is securely in place to prevent any paint from bleeding onto unwanted areas.
Step 4: Prime the Surface
Apply a plastic primer to the surface of the shower using a paintbrush or roller. Make sure to apply the primer in thin, even coats, and allow each coat to dry completely before applying the next. Follow the manufacturer’s instructions for drying time and number of coats needed.
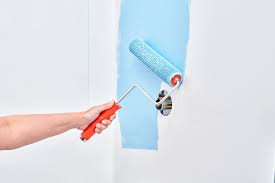
Step 5: Paint the Surface
Once the primer has dried completely, it’s time to apply the paint. Choose a paint specifically designed for use on plastic surfaces, as this will ensure that the paint adheres properly and will last longer. Apply the paint in thin, even coats, making sure to cover the entire surface. Allow each coat to dry completely before applying the next, and follow the manufacturer’s instructions for drying time and number of coats needed.
Step 6: Remove the Tape
Once the final coat of paint has dried, carefully remove the painter’s tape from the shower. Make sure to remove the tape slowly and at an angle to prevent any paint from peeling off with the tape.
Tips and Tricks:
Make sure to choose a paint specifically designed for use on plastic surfaces. Using the wrong type of paint could result in peeling or flaking over time.
Use a light touch when sanding the surface of the plastic shower. You don’t want to sand too much or too hard, as this could damage the surface and affect the final result.
Make sure to apply the primer and paint in thin, even coats. Thick coats can result in drips or an uneven finish.
Be patient and allow each coat of primer and paint to dry completely before applying the next. Rushing the process could result in a less-than-perfect finish.
Consider using a paintbrush rather than a roller for small or hard-to-reach areas of the shower.
If you are unsure about painting your plastic shower yourself, consider hiring a professional to do the job for you.
In conclusion, painting a plastic shower can be a great way to refresh the look of your bathroom without the cost of replacing the shower altogether. By following the steps outlined above and using the right materials, you can achieve a successful and long-lasting result. With a little patience and attention to detail, you can transform your plastic shower into a beautiful and updated feature of your bathroom.Paint Plastic Shower