")
Removing forms from concrete is an important part of any concrete project. Forms serve the purpose of securing the concrete in position during the drying process, and once the concrete has solidified, it is necessary to remove the forms. In this article, we will explore the steps involved in removing forms from concrete.
Step 1: Wait for the Concrete to Set
Prior to removing the forms from the concrete, it is essential to allow sufficient time for the concrete to set. The duration of setting time varies based on factors like temperature, humidity, and the concrete type. As a general guideline, it is recommended to wait for a minimum of 24 hours before removing the forms.
Step 2: Loosen the Forms
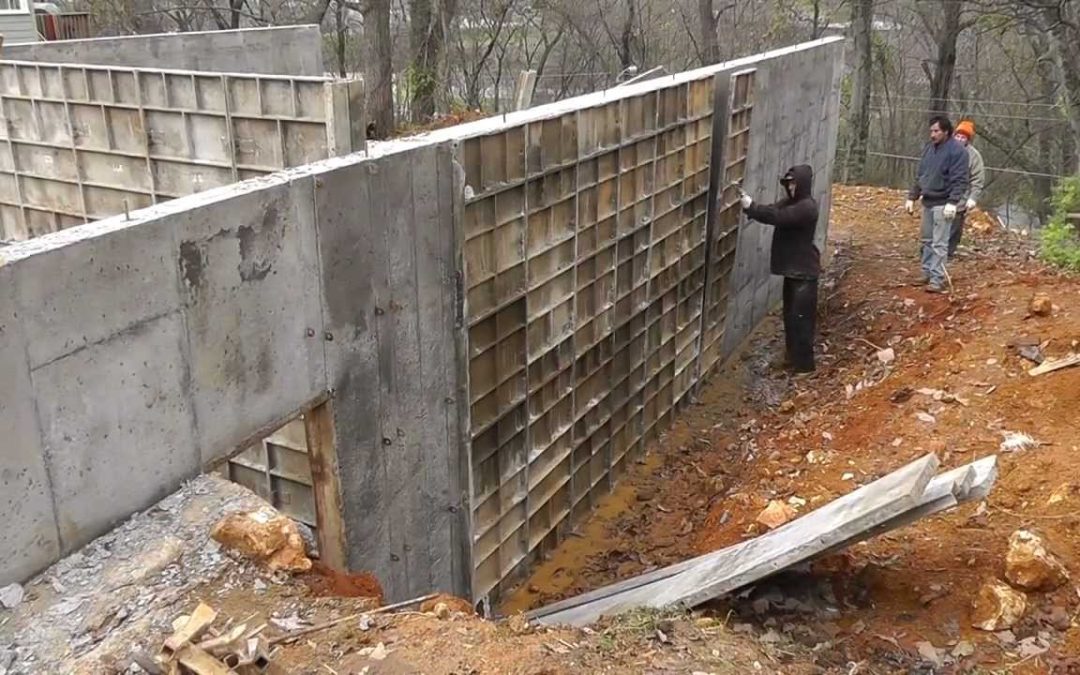
Once the concrete has set, you can begin to remove the forms. Start by loosening the forms from the concrete. Use a hammer or rubber mallet to gently tap the forms away from the concrete. Work your way around the form, tapping it gently until it becomes loose.
Step 3: Remove the Stakes
Once the form is loose, you can remove the stakes. Use a hammer or pry bar to remove the stakes from the ground. Be careful not to damage the concrete when removing the stakes.
Step 4: Pull the Forms
Away With the stakes removed, you can now pull the forms away from the concrete. Start at one end of the form and pull it away from the concrete. Work your way down the form, pulling it away from the concrete as you go. If the form is stuck, use a pry bar to gently loosen it from the concrete.
Step 5: Remove the Form Release Agent
If you used a form release agent, you will need to remove it from the concrete after the forms are removed. Use a stiff bristle brush and water to scrub the form-release agent from the surface of the concrete. Rinse the surface with water to remove any remaining form release agent.
Step 6: Patch Any Holes
After the forms are removed, you may notice small holes or imperfections in the surface of the concrete. These can be filled with a concrete patching compound. Follow the manufacturer’s instructions to apply the patching compound to the holes or imperfections. Smooth the surface of the patching compound with a trowel and allow it to dry.
Step 7: Seal the Surface
Once the patching compound has dried, you can seal the surface of the concrete. Use a concrete sealer to protect the surface of the concrete from water damage, stains, and other types of damage. Follow the manufacturer’s instructions to apply the sealer to the surface of the concrete.
Tips for Removing Forms from Concrete
Use the Right Tools: To remove the forms from concrete, you will need a hammer or rubber mallet, pry bar, and a stiff bristle brush.
Be Gentle: When removing the forms from concrete, be gentle. Use a light touch with the hammer or pry bar to avoid damaging the concrete.
Use Form Release Agent: Using a form release agent can make it easier to remove the forms from concrete. Apply the form release agent to the forms before pouring the concrete.
Remove Stakes Carefully: When removing the stakes from the ground, be careful not to damage the concrete.
Patch Any Holes: After the forms are removed, patch any holes or imperfections in the surface of the concrete with a concrete patching compound.
Conclusion
Removing forms from concrete is an important part of any concrete project. Wait for the concrete to set before removing the forms. Loosen the forms with a hammer or rubber mallet, remove the stakes, and pull the forms away from the concrete. Remove any form release agent from the surface of the concrete and patch any holes or imperfections. Seal the surface of the concrete with a concrete sealer to protect it from damage.