")
Replac a drop-in bathroom sink can seem like a daunting task, but it’s actually a fairly simple DIY project that can be done in just a few hours. A drop-in sink, also known as a self-rimming sink, is a type of sink that sits on top of the counter rather than being mounted underneath it. Here’s a step-by-step guide on how to replace drop bathroom sink.
Tools and Materials Needed:
New drop-in bathroom sink
Plumber’s putty
Adjustable wrench or pliers
Screwdriver
Silicone caulk
Razor blade or utility knife
Bucket or bowl
Towels or rags
Tape measure
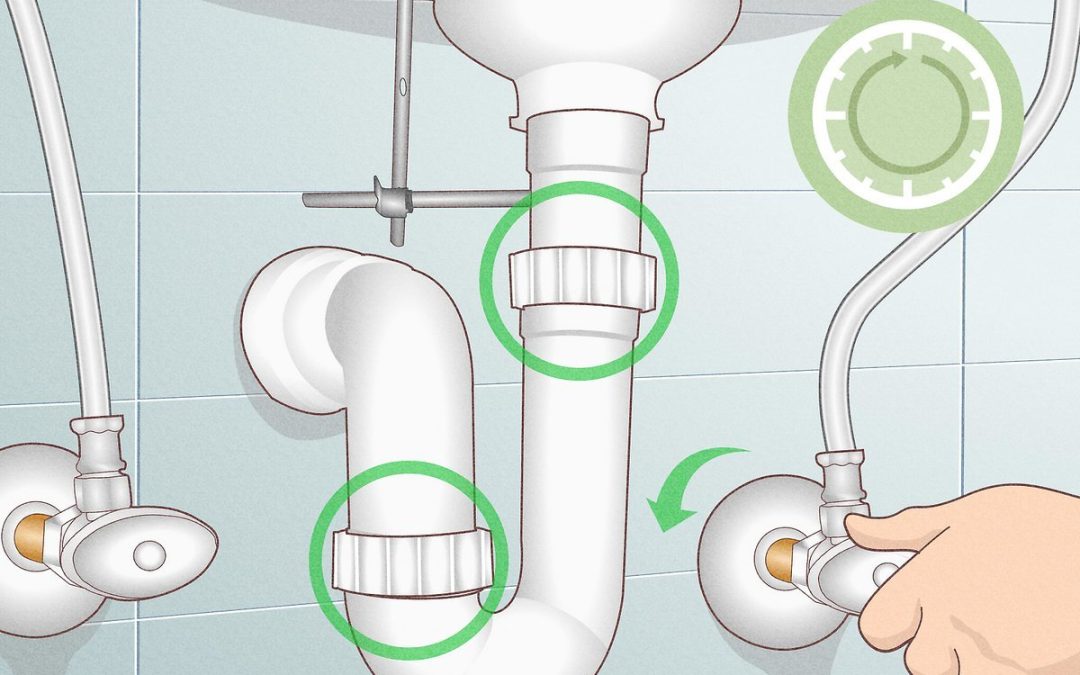
Step 1: Turn off the Water Supply
Before beginning any plumbing project, it’s important to turn off the water supply to the sink. Look for the shut-off valves under the sink or turn off the main water supply to the house. Turn on the faucet to release any remaining water in the pipes and let it run until it stops.
Step 2: Remove the Old Sink
Use an adjustable wrench or pliers to remove the nuts that hold the faucet and drain in place. Disconnect the water supply lines from the faucet and drain. If necessary, use a razor blade or utility knife to cut through any caulk or adhesive that is holding the sink in place. Lift the old sink out of the countertop and set it aside.
Step 3: Prepare the Area
Clean the area where the old sink was located. Remove any old caulk or adhesive from the countertop and clean the area thoroughly with soap and water. Dry the area with towels or rags.
Step 4: Install the New Sink
Apply a thin layer of plumber’s putty around the edge of the new sink. Carefully place the sink into the hole in the countertop, making sure it is level and centered. Tighten the mounting clips or brackets that came with the sink to hold it in place.
Step 5: Connect the Faucet and Drain
Connect the water supply lines to the faucet and tighten the nuts with pliers or an adjustable wrench. Insert the drain assembly into the drain hole and tighten the nut from underneath the sink.
Step 6: Seal the Sink
Apply a bead of silicone caulk around the edge of the sink where it meets the countertop. Smooth the caulk with your finger or a caulk smoothing tool to create a tight seal. Wipe away any excess caulk with a damp cloth.
Step 7: Turn on the Water Supply
Turn on the water supply to the sink and check for leaks. Run water through the faucet and drain to make sure everything is working properly. If there are any leaks, tighten the connections or adjust the mounting clips as needed.
Tips:
Be sure to measure the size of the old sink before purchasing a new one to ensure a proper fit.
It’s a good idea to have an assistant help you lift the old sink out and install the new one.
If you’re having trouble removing the old sink, use a putty knife or scraper to loosen any adhesive or caulk that may be holding it in place.
Use a level to ensure that the new sink is installed evenly and doesn’t slope to one side.
Let the silicone caulk dry completely before using the sink or cleaning it.
In conclusion, replacing a drop-in bathroom sink can be a straightforward DIY project that can be completed with just a few tools and materials. With these steps, you can replace your old sink and give your bathroom a fresh, new look. Remember to turn off the water supply before beginning, prepare the area, install the new sink, connect the faucet and drain, seal the sink with silicone caulk, and turn the water supply back replace drop bathroom sink.