")
Replacing a window handle is a simple yet effective way to improve the functionality and aesthetics of your windows. Over time, window handles can become worn, damaged, or outdated, making it necessary to replace them. Fortunately, replacing a window handle is a relatively straightforward process that can be completed with a few basic tools and some careful steps. In this guide, we will walk you through the step-by-step process of replacing a window handle.
Here’s what you’ll need:
- New window handle
- Screwdriver (flathead or Phillips, depending on the screw type)
- Pliers (optional, for removing stubborn screws)
- Safety goggles (optional, for eye protection)
Step 1: Prepare the work area
Before you begin, ensure that the window is closed and locked. This will prevent the window from accidentally opening or falling during the replacement process. Clear the area around the window, removing any objects or obstacles that may hinder your work.
Step 2: Identify the type of window handle
There are various types of window handles, including crank handles, lever handles, and sliding handles. Identify the type of handle that needs to be replaced. Take note of any specific features or mechanisms unique to your window handle, as this information will be helpful when selecting a replacement.
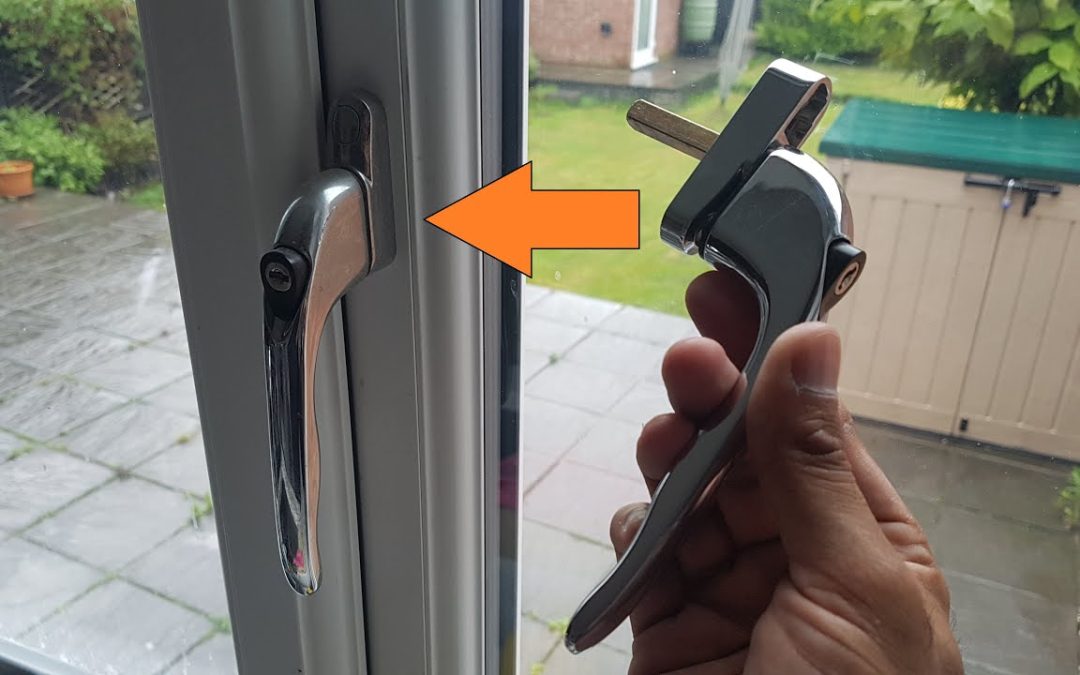
Step 3: Remove the old window handle
To remove the old window handle, locate the screws that attach it to the window frame. These screws are typically located on the interior side of the window. Use a screwdriver (flathead or Phillips) that matches the screw type to loosen and remove the screws. If the screws are tight or difficult to remove, you can use pliers for extra leverage.
Step 4: Measure and prepare for the replacement handle
Once the old handle is removed, measure the distance between the screw holes in the window frame. This measurement will help you select a replacement handle that matches the hole spacing. Additionally, check the spindle length of the old handle and ensure that the replacement handle has a similar spindle length to ensure compatibility.
Step 5: Install the new window handle
Take the new window handle and align it with the screw holes in the window frame. Insert the screws through the holes in the handle and into the corresponding holes in the window frame. Use the screwdriver to tighten the screws securely, but be careful not to overtighten them as it may strip the screw holes or damage the handle.
Step 6: Test the functionality
After installing the new handle, test its functionality. Operate the window handle to open and close the window, ensuring that it moves smoothly and securely locks into place. Check if any additional adjustments or tightening of screws require to ensure proper operation.
Step 7: Clean up and maintenance
Clean the window area, removing any debris or dust that may have accumulated during the replacement process. If necessary, apply a lubricant or silicone spray to the moving parts of the window handle to keep it functioning smoothly. Regularly inspect and clean the window handle to maintain its condition and prolong its lifespan.
In conclusion, replacing a window handle is a straightforward task that can accomplish with a few basic tools and following the outlined steps. By selecting a suitable replacement handle, carefully removing the old handle, and properly installing the new one, you can improve the functionality and appearance of your windows. Remember to prioritize safety, take measurements, and test the functionality of the new handle to ensure a successful replacement.