")
A concrete drain cover slab is an essential part of any drainage system. It provides a sturdy and durable cover for the drainage channel, preventing debris from entering the drain and causing blockages. In this guide, we will walk you through the steps of installing a concrete drain cover slab.
Step 1: Measure the Drainage Channel
The first step in the installation process is to measure the size of the drainage channel. Use a measuring tape to determine the length and width of the drainage channel. Make sure to measure accurately to ensure that the concrete drain cover slab will fit perfectly over the channel.
Step 2: Choose the Type of Concrete Drain Cover Slab
There are different types of concrete drain cover slabs available in the market, and you need to choose the one that suits your needs. Consider factors such as the weight capacity, design, and material when choosing the concrete drain cover slab.
Step 3: Prepare the Site
Once you have chosen the type of concrete drain cover slab, the next step is to prepare the site where the slab will be installed. Clear the area around the drainage channel of any debris or obstructions, including rocks, leaves, and branches. Make sure that the area is level and smooth.
Step 4: Mix the Concrete
Mix the concrete according to the manufacturer’s instructions. If you are unsure about the mixing ratio, seek advice from a professional or refer to the instructions on the packaging. Mix the concrete until it has a smooth, consistent texture.
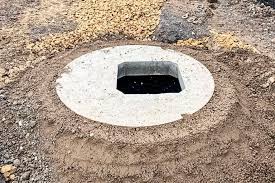
Step 5: Pour the Concrete
Once the concrete is mixed, pour it into the area around the drainage channel. Spread the concrete evenly with a trowel, making sure that it fills the area completely. Make sure that the concrete is level and smooth.
Step 6: Place the Concrete Drains Cover Slab
After pouring the concrete, the next step is to place the concrete drains cover slab over the drainage channel. Make sure that the slab fits perfectly over the channel and is level with the surrounding concrete. Use a spirit level to check that the slab is level.
Step 7: Secure the Drain Cover Slab
Once the concrete drain cover slab is in place, the next step is to secure it. Use mortar or concrete to fill the gaps between the slab and the surrounding concrete. Make sure to fill the gaps completely to prevent water from entering the drainage channel. Smooth the mortar or concrete with a trowel, and allow it to dry completely.
Step 8: Test the Drainage System
After the concrete has dried, the final step is to test the drainage system. Turn on the water and observe how the water flows through the drainage channel. Check to see if the concrete drains cover slab is securely in place and if water is flowing smoothly through the channel.
In conclusion, installing a concrete drains cover slab is an important part of any drainage system. It helps to prevent debris from entering the drainage channel and causing blockages. It is important to follow the installation steps carefully to ensure that the concrete drain cover slab install properly and securely. If you are unsure about any part of the installation process, it is recommended to seek professional help to avoid any mistakes that could be costly or dangerous.