")
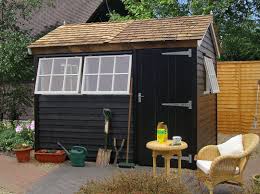
If you’re looking to add some extra storage space to your backyard or garden, a Stirling shed could be the perfect solution. Stirling sheds are sturdy and durable, with a range of sizes and designs to choose from. In this step-by-step guide, we will walk you through the process of installing a Stirling shed.
Materials and Tools:
- Stirling shed kit
- Level
- Shovel
- Rake
- Wheelbarrow
- Hammer
- Screwdriver
- Power drill
- Safety glasses
- Gloves
- Tape measure
Step 1: Prepare the Site
Before you begin installing your Stirling shed, it’s important to prepare the site where you will be placing it. Start by choosing a level area with good drainage. Clear any debris, rocks, or roots from the site using a shovel and rake. Use a level to check that the site is level, and make any necessary adjustments.
Step 2: Lay the Foundation
Stirling sheds require a solid, level foundation to ensure stability and durability. There are several options for shed foundations, including concrete slabs, wood platforms, and gravel or crushed stone. Check the instructions for your Stirling shed kit to determine the recommended foundation type and size.
If you choose to build a wooden platform, start by measuring and marking the corners of the platform using stakes and string. Dig holes at the corners and place concrete footings in each hole. Cut pressure-treated lumber to size and secure the boards to the footings using bolts or screws. Add additional boards to the frame as needed to create a solid platform.
Step 3: Install the Shed Floor
Once the foundation is in place, you can begin installing the shed floor. Start by laying out the floor panels according to the instructions. Use a hammer and nails or a power drill and screws to attach the panels to the floor joists. Check that the floor is level before moving on to the next step.
Step 4: Assemble the Walls
Next, you’ll assemble the walls of the Stirling shed. Lay out the wall panels according to the instructions, and use a power drill and screws to attach the panels together at the corners. Check that the walls are level before attaching them to the floor. Use screws to attach the walls to the floor and to each other at the corners.
Step 5: Add the Roof
Once the walls are in place, you can add the roof of the Stirling shed. Lay out the roof panels according to the instructions, and use screws to attach them to the roof joists. Check that the roof is level and secure before moving on to the next step. Stirling sheds
Step 6: Install the Doors and Windows
After the roof is in place, you can install the doors and windows of the Stirling shed. Check the instructions for your kit to determine the best way to attach the doors and windows to the walls. Use a power drill and screws to attach the hardware securely.
Step 7: Finishing Touches
With the shed fully assembled, you can add any finishing touches, such as paint or stain. Be sure to allow adequate time for any finishes to dry before using the shed for storage.
Safety Tips:
- Wear safety glasses and gloves when using power tools.
- Take care when handling heavy materials and equipment.
- Make sure the site is free from hazards, such as rocks or roots.
- Use a level to ensure that the shed is stable and secure.
- Check the instructions for your shed kit before starting to ensure that you have all the necessary tools and materials.
In conclusion, installing a Stirling shed can be a great way to add extra storage space to your backyard or garden. By following these simple steps and taking the necessary safety precautions, you can install your shed with confidence and enjoy the added storage and organization that it provides. Remember to check the instructions for your specific shed kit, as the installation process may vary slightly depending on the design and size of your shed.