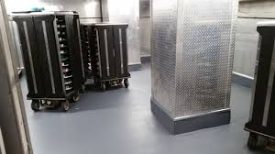
Building a walk-in freezer is a complicated process, and the floor is one of the most critical components. It must be durable, well-insulated, and capable of supporting heavy loads. Here is a step-by-step guide to constructing a walk-in freezer floor.
Step 1: Plan and Prepare
Before you begin construction, plan the layout of your walk-in freezer and determine the size of the floor you need. You should also check the local building codes to ensure that your floor construction meets the requirements.
Next, gather all the necessary tools and materials, including a level, a measuring tape, a saw, a drill, a hammer, a trowel, concrete, insulation materials, a vapor barrier, and rebar. Ensure that you have protective gear like gloves, a mask, and safety glasses.
Step 2: Excavate and Level the Ground
After measuring and marking the floor’s boundaries, excavate the soil and debris to a depth of at least 8 inches. Remove any rocks, roots, or other obstacles that could compromise the floor’s stability.
Next, level the ground and compact it with a plate compactor or a hand tamper to create a firm base. You can also add a layer of crushed stone or gravel to improve the drainage and prevent water buildup.
Step 3: Install the Vapor Barrier
The vapor barrier is a layer of plastic sheeting that prevents moisture from seeping into the concrete and insulation layers. Place it over the leveled ground, ensuring that it covers the entire floor area and extends up the walls.
Use a utility knife to trim the excess material and seal any seams or overlaps with tape or adhesive. This step is crucial to prevent condensation and mold growth, which can compromise the freezer’s hygiene and safety.
Step 4: Lay the Rebar Grid
The rebar grid provides reinforcement and structural integrity to the concrete slab. Using a rebar bender and cutter, create a grid of evenly spaced and intersecting steel bars that match the floor’s dimensions.
Place the rebar on top of the vapor barrier, ensuring that it rests on chairs or supports that lift it at least 2 inches above the ground. This spacing allows the concrete to flow around and cover the rebar completely.
Step 5: Pour and Level the Concrete
Mix the concrete according to the manufacturer’s instructions and pour it over the rebar grid. Spread it evenly with a trowel, ensuring that it fills all the corners and edges of the floor.
Use a screed board or a bull float to level the concrete and remove any excess material. This step is crucial to ensure that the concrete cures evenly and does not create any dips or bumps that could affect the freezer’s insulation and stability.
Step 6: Add Insulation Material
Once the concrete has cured, it’s time to add the insulation material that will prevent heat transfer between the freezer and the outside environment. You can use rigid foam board, spray foam, or other specialized insulation products that meet the local building codes and standards.
Cut the insulation material to fit the floor’s dimensions, leaving a gap of at least 1/4 inch around the edges to allow for expansion. Place it on top of the concrete and use adhesive or mechanical fasteners to secure it in place.
Step 7: Install the Floor Finish
The floor finish is the final layer that covers the insulation and provides a durable and hygienic surface for the freezer. You can use epoxy coatings, tiles, or other materials that resist moisture, chemicals, and temperature changes.
Apply the floor finish according to the manufacturer’s instructions, ensuring that it adheres to the insulation layer and creates a smooth and even surface. This step is crucial to prevent any cracks, leaks, or other defects that could affect the freezer’s performance and safety.
Step8: Test and Inspect the Floor
After completing the floor construction, it’s essential to test and inspect it to ensure that it meets the quality and safety standards. Use a moisture meter to check the vapor barrier and insulation layers for any signs of moisture, and fix any leaks or gaps that you find.
You should also inspect the rebar grid and the concrete slab for any cracks, voids, or other defects that could affect the floor’s strength and stability. If you find any issues, you may need to reinforce or repair the affected areas.
Additionally, check the floor’s levelness and alignment using a laser level or a water level. The floor must be perfectly level and flat to ensure that the freezer’s doors and shelving units work correctly.
9: Maintain and Clean the Floor
To ensure that your walk-in freezer floor lasts for a long time and remains hygienic and safe, you must maintain and clean it regularly. Remove any spills or debris as soon as possible to prevent staining or damage to the floor finish.
You can use specialized cleaning products and equipment that are designed for freezer floors, such as ice scrapers, steam cleaners, or pressure washers. Ensure that you follow the manufacturer’s instructions and safety guidelines to avoid damaging the floor or exposing yourself to hazards.
Also, monitor the floor’s condition regularly and address any signs of wear and tear, such as cracks, chips, or scratches. These issues can compromise the floor’s insulation and hygiene, and require immediate repair or replacement.
In conclusion, building a walk-in freezer floor requires careful planning, precise execution, and regular maintenance. By following these steps and guidelines, you can ensure that your floor provides the necessary insulation, support, and hygiene for your freezer, and meets the local building codes and safety standards.

