")
Introduction:
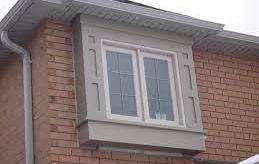
When it comes to enhancing the functionality and aesthetics of your kitchen, a bump-out window can make a significant difference. This innovative design element not only brings in abundant natural light but also creates additional space for various purposes. In this step-by-step guide, we will explore the process of installing a kitchen bump out window, from planning to execution. So let’s dive in and discover how you can transform your kitchen with this stunning feature.
Planning and Preparation
Before embarking on any home improvement project, meticulous planning is crucial. Consider the following key points:
Assessing the Kitchen Layout: Examine your kitchen’s layout to determine the ideal location for the bump out window. Consider factors such as available wall space, proximity to existing windows, and impact on the overall aesthetics.
Obtaining Permits: Check with your local building department to understand any necessary permits or regulations for installing a bump-out window. Compliance ensures a smooth and legal installation process.
Setting a Budget: Establish your project’s budget, encompassing expenses for materials, labor costs, and any potential additional expenditures that may arise throughout the construction process.
By upholding a well-defined financial plan, you will effectively sustain your focus and commitment to your objectives throughout the entirety of the process.
Choosing the Window Style: Select a window style that complements your kitchen’s design. Popular options include casement, awning, or picture windows. Consider factors such as ventilation, energy efficiency, and maintenance requirements when making your decision.
Installation Process
Here’s a breakdown of the essential steps involved:
Removing Existing Materials: If there is a wall in the chosen location, it needs to be carefully demolished to create space for the new bump-out window. Ensure that the area is properly supported during this process to maintain the structural integrity of your home.
Framing the Opening: Construct a new frame for the bump-out window, adhering to the specific measurements and design requirements. It’s crucial to consult with a professional or follow established guidelines to ensure the frame’s stability and durability.
Installing the Window: Carefully position the window within the framed opening, making sure it fits snugly and securely. Utilize suitable tools and materials to firmly secure the window in its designated position, while adhering to the instructions provided by the manufacturer.
Insulation and Sealing: To prevent drafts and maximize energy efficiency, insulate the window opening using insulation materials. Properly seal the gaps around the window frame to avoid air leakage and moisture penetration.
Finishing Touches: Complete the installation by adding trim and molding to enhance the aesthetic appeal of the bump-out window. Paint or stain the trim to match your kitchen’s decor, achieving a seamless integration with the existing design.
Step 3: Conclusion
Installing a bump-out window in your kitchen can transform the space, providing an abundance of natural light and a charming focal point. Remember to consult professionals when needed and adhere to local regulations to ensure a successful project.
Incorporating a bump-out window into your kitchen design not only adds functionality but also creates a visually appealing feature that can elevate the overall ambiance of the room. So, why wait? Start planning your kitchen bump-out window project today and enjoy the benefits of a brighter, more inviting space.
An Insider’s Guide to the Historic Craftsman Kitchen is a comprehensive resource that offers valuable insights into designing a kitchen with a historic Craftsman aesthetic. Whether you’re seeking inspiration or guidance on incorporating the bump-out window into your Craftsman kitchen, this article is a valuable read.