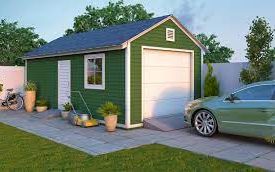
Building a 12×24 shed house can be a great DIY project for those who want to add some extra living space to their property. Shed houses are becoming increasingly popular due to their affordability and versatility, and a 12×24 size is a popular choice for those who want a larger space but still want to keep the project manageable. Here is the ultimate guide to building a 12×24 shed house.
Plan and Design
The first step in building a shed house is to plan and design the structure. You should consider what you want to use the space for, how many people will be living in the house, and any other specific needs you may have. Once you have a good idea of what you want, you can start sketching out a design and making a materials list.
Obtain Permits
Before you start building, you need to obtain any necessary permits from your local government. The requirements vary depending on where you live, but you will likely need a building permit and possibly other permits as well. It’s important to follow all regulations to ensure that your shed house is safe and legal.
Choose a Foundation
The foundation is the base of your shed house, so it’s important to choose the right one. You can use a concrete slab, gravel, or pier and beam foundation. Each option has its own benefits and drawbacks, so it’s important to choose one that fits your needs and budget.
Build the Frame
The frame is the skeleton of the shed house, and it’s important to get it right. You can use wood or metal framing, but wood is more common for DIY projects. You will need to cut the lumber to size and secure it using screws or nails. It’s important to make sure the frame is level and square to ensure that the rest of the building goes smoothly.
Install the Roof
The roof is one of the most important parts of your shed house, as it protects the interior from the elements. You can use metal, shingles, or other materials for your roof. It’s important to choose a material that is durable and matches the style of your shed house. Once you have your materials, you can start installing the roof.
Install the Siding
The siding is the outer covering of your shed house, and it also plays a role in protecting the interior. You can use wood, vinyl, or metal siding, depending on your preferences and budget. You will need to measure and cut the siding to size and secure it to the frame using screws or nails.
Install Windows and Doors
Windows and doors allow light and air into your shed house, and they also provide access. You can purchase pre-made windows and doors or build them yourself. It’s important to make sure they are properly installed to prevent leaks and drafts.
Finish the Interior
Once the exterior is complete, it’s time to finish the interior. This can include insulation, drywall, flooring, and any other finishes you want. You will need to install electrical and plumbing systems if you plan to use the space as a living area. It’s important to follow all safety guidelines when installing these systems.
Add the Final Touches
The final touches are what make your shed house feel like a home. You can add furniture, decor, and any other personal touches you want. You can also add landscaping around the exterior to make it look more inviting.
Building a 12×24 shed house is a big project, but with the right planning and preparation, it can be a rewarding experience. Just remember to take your time, follow all safety guidelines, and don’t be afraid to ask for help when you need it.

