")
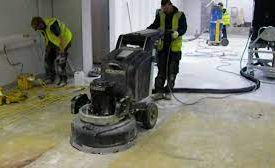
Installing a concrete floor buffer is essential to maintain the quality and longevity of your concrete floors. It is a simple process that can be done with the right tools and materials. In this guide, we will take you through the steps required to install a concrete floor buffer.
Step 1: Choose the right buffer
The first step is to choose the right buffer for your concrete floors. There are several types of buffers available in the market, but the most suitable ones for concrete floors are high-speed rotary buffers. These buffers have a speed of 175 RPM or more, which is necessary to achieve a polished finish.
Step 2: Prepare the surface
Before you begin buffing, it is essential to prepare the surface by cleaning and sweeping the floor. Remove all dirt, dust, and debris from the floor to ensure a smooth finish. You can also use a vacuum cleaner to remove any small particles that may be left behind.
Step 3: Apply the polishing compound
The next step is to apply a polishing compound to the floor. The polishing compound helps to remove any stains or marks from the floor and gives it a smooth finish. You can use any commercial polishing compound available in the market, but make sure it is compatible with your buffer.
Step 4: Attach the pad to the buffer
Attach the pad to the buffer before starting to buff. The pads come in different sizes, and you should choose the right size for your buffer. Make sure the pad is securely attached to the buffer and is evenly distributed. It is also essential to check the manufacturer’s instructions on how to attach the pad correctly.
Step 5: Start buffing
Start buffing the floor with the buffer in a back-and-forth motion. Make sure to overlap the previous pass slightly to ensure that the entire surface is buffed evenly. You can use a light pressure while buffing, and if you notice any areas that require extra attention, focus on those areas.
Step 6: Apply more polishing compound
Once you have finished buffing the entire surface, apply more polishing compound and buff the floor again. This step is necessary to ensure that the surface is smooth and polished. You may need to repeat this step a few times until you achieve the desired finish.
Step 7: Clean the buffer and pad
After you have finished buffing the floor, it is essential to clean the buffer and pad thoroughly. Remove the pad from the buffer and wash it with warm soapy water. You can also use a pad cleaning solution available in the market. Clean the buffer and wipe it down with a clean cloth.
Step 8: Inspect the floor
Inspect the floor to ensure that it polish evenly and there are no areas that require further buffing. If you notice any areas that need extra attention, repeat the buffing process on those areas.
Step 9: Apply sealant (optional)
If you want to protect your concrete floor from future stains and marks, you can apply a sealant. A sealant helps to prevent water, oil, and other liquids from penetrating the surface of the floor. Apply the sealant following the manufacturer’s instructions.
Conclusion
Installing a concrete floor buffer is a simple process that can do with the right tools and materials. The key to achieving a polished finish is to choose the right buffer, prepare the surface, apply the polishing compound, and buff the floor evenly. With these steps, you can transform your concrete floors and make them look brand new.