")
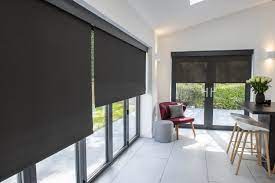
Roller shades with fascia are an excellent option for those who want a sleek and modern window treatment. The fascia not only adds to the aesthetic appeal of the shade but also provides a practical solution for hiding the roller and controls. We will walk you through the step-by-step process of installing roller shades with fascia.
Materials and Tools Needed
- Roller shades with fascia
- Mounting brackets
- Screws
- Drill
- Measuring tape
- Level
- Pencil
Step 1: Measure and Mark the Window Frame
Start by measuring the inside of the window frame where you want to install the roller shades. Begin by measuring the width and height of the frame, then use a pencil to mark the central point of the window. Use a level to ensure that the mark is straight.
Step 2: Install the Mounting Brackets
Next, install the mounting brackets. Hold the bracket up to the mark you made on the window frame and mark the location of the screw holes with a pencil. Repeat this process for the other bracket.
Use a drill to make pilot holes at the marked locations. Then, screw the brackets into place using the screws provided with the roller shades.
Step 3: Install the Fascia
Slide the fascia over the roller shade and attach it to the mounting brackets. Make sure that the fascia is level and centered over the roller shade. Use screws to secure the fascia to the mounting brackets.
Step 4: Install the Roller Shade
Slide the roller shade into the fascia and click it into place. Make sure that the shade is level and centered within the fascia.
Step 5: Test the Shade
Pull the shade down to test it. Make sure that it operates smoothly and stays level. Adjust the shade if necessary.
Step 6: Finish Up
Finally, clean up any debris and enjoy your new roller shades with fascia!
Tips and Tricks
- Before starting the installation process, make sure to read the manufacturer’s instructions that came with your roller shades with fascia.
- Measure twice to ensure accuracy before making any marks or drilling any holes.
- Use a level to ensure that your marks and installation are straight and level.
- If you have trouble installing the mounting brackets, use wall anchors for added support.
- In case you encounter difficulty while sliding the fascia onto the mounting brackets, consider applying a small quantity of lubricant to the brackets for smoother movement.
- Always test the shade before finishing up the installation process.
Conclusion
Installing roller shades with fascia is a great way to add a modern and sleek window treatment to your home. By following these steps and tips, you can easily install your new roller shades with fascia in no time. Remember to take your time, measure accurately, and test the shade before finishing up the installation process.