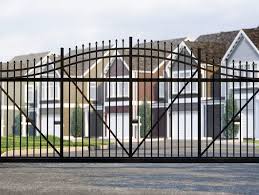
The Ameristar cantilever gate is an excellent option for homeowners and businesses that require secure access control to their property. The cantilever gate is designed to slide open and close without the use of a traditional track system, making it a popular choice for areas with heavy snow or debris buildup. In this guide, we will take you through the steps to install an Ameristar cantilever gate to help you enhance the security and functionality of your property.
Materials needed:
- Ameristar cantilever gate
- Gate operator (optional)
- Concrete or asphalt pad
- Gate post
- Gate frame
- Gate rollers
- Gate Hardware
- Level
- Measuring tape
- String line
- Shovel
- Concrete mix
- Bolts
Step 1: Choose a location
The first step in installing an Ameristar cantilever gate is to choose a location. You will need a flat surface for the gate to slide on and enough space for the gate to fully open. Consider the terrain, existing structures, and any potential obstacles when selecting the gate location.
Step 2: Install the gate post
The gate post is a critical component of the Ameristar cantilever gate system. It supports the gate frame and allows the gate to slide open and closed. Dig a hole for the gate post and pour concrete or asphalt to secure it in place. Ensure that the post is level and plum.
Step 3: Install the gate frame
The gate frame is the backbone of the Ameristar cantilever gate system. Attach the frame to the gate post using bolts and ensure that it is level and plum. Use a string line to ensure that the gate frame is straight.
Step 4: Install the gate rollers
The gate rollers are attached to the gate frame and allow the gate to slide open and closed. Install the rollers on the gate frame, ensuring that they are level and spaced correctly. Use a measuring tape to ensure that the rollers are evenly spaced.
Step 5: Install the gate
Attach the Ameristar cantilever gate to the gate rollers. Ensure that the gate is level and that the rollers correctly aligned with the gate frame. Test the gate by sliding it open and closed to ensure that it moves smoothly.
Step 6: Install the gate operator (optional)
If you prefer an automated gate system, you can install a gate operator to your Ameristar cantilever gate. The gate operator will allow you to open and close the gate using a remote control or keypad. Follow the manufacturer’s instructions to install the gate operator and ensure that it is wired correctly.
Step 7: Test the gate
Once the Ameristar cantilever gates installs, it’s essential to test it thoroughly to ensure that it works correctly. Open and close the gate several times and make any necessary adjustments to the gate rollers or gate frame. Test any gate operator components to ensure that they function correctly.
In conclusion, installing Ameristar cantilever gates is a relatively straightforward process that can significantly enhance the security and functionality of your property. Whether you’re a homeowner or a business owner, an Ameristar cantilever gates can provide secure access control to your property. With proper installation and maintenance, an Ameristar cantilever gate can last for many years and provide you with peace of mind knowing that your property is secure.

