")
Introduction:
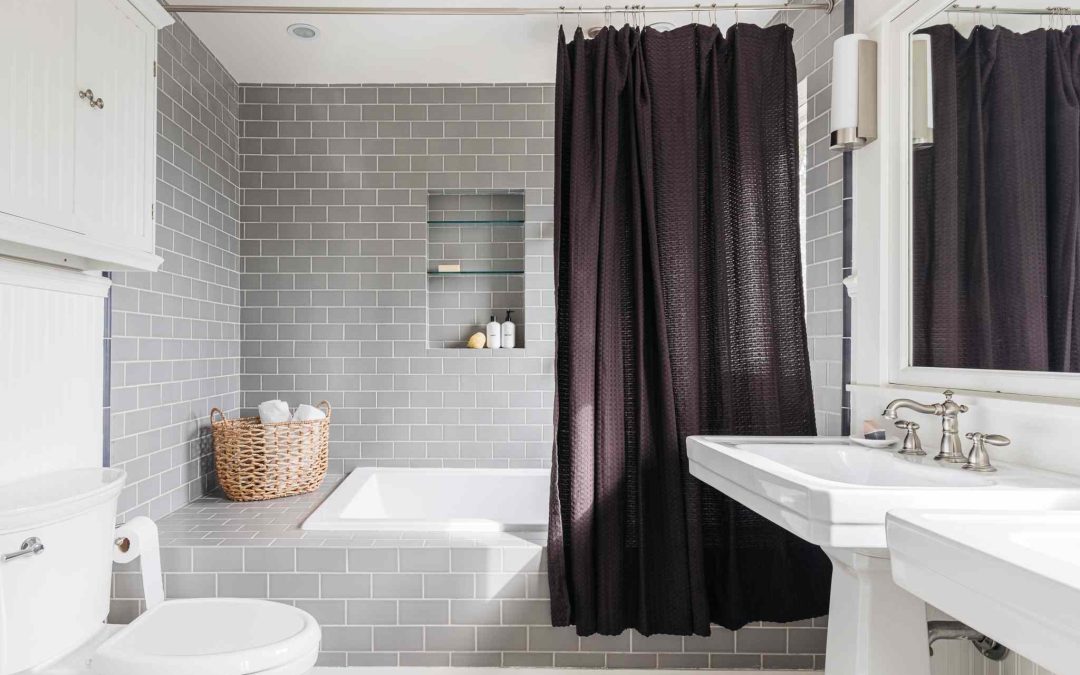
Subway tiles have become a popular choice for bathroom renovations due to their timeless appeal and versatility. Whether you’re a seasoned DIY enthusiast or a novice homeowner, installing subway tiles can be a rewarding project. In this blog post, we have compiled a comprehensive guide with valuable tips and insights to assist you in achieving a successful installation of subway tiles in your bathroom.
Why Choose Subway Tiles for Your Bathroom?
Subway tiles offer a classic and clean look that complements various bathroom styles, from traditional to modern. Their rectangular shape and beveled edges create a visually appealing pattern, adding depth and character to your space. Furthermore, subway tiles are known for their durability, easy maintenance, and resistance to moisture, making them a perfect choice for bathroom installations.
Planning and Preparation:
Before starting the installation process, thorough planning is crucial. Before starting the installation process, it is essential to measure the specific area you intend to tile and accurately calculate the number of tiles needed. Consider factors such as tile size, color, and grout options to ensure a cohesive design. Make sure to purchase additional tiles to account for any breakages or future repairs.
Surface Preparation:
Prepare the surface where the tiles will be installed. Make sure that the walls are thoroughly cleaned, completely dry, and devoid of any loose debris. Fill in any cracks or imperfections with a suitable filler and sand the surface if necessary. A smooth and level substrate is essential for a seamless tile installation.
Gather the Necessary Tools and Materials:
To complete the installation, you will need the following tools and materials:
Subway tiles
Tile adhesive or thin-set mortar
Notched trowel
Tile spacers
Tile cutter or wet saw
Grout
Grout float
Sponge
Level
Rubber grout float
Tile Installation:
Start by applying a layer of tile adhesive or thin-set mortar onto the wall using a notched trowel. Begin at the bottom and work your way up, ensuring even coverage. Press the subway tiles firmly into place, using tile spacers to maintain consistent spacing between each tile. Cut tiles as needed to fit around edges, corners, or fixtures.
Grouting:
Once the adhesive has dried, remove the tile spacers and mix the grout according to the manufacturer’s instructions. Apply the grout using a rubber grout float, working it into the gaps between the tiles at a 45-degree angle. Remove excess grout using a sponge, taking care not to disturb the freshly applied grout. Allow the grout to cure before proceeding.
Finishing Touches:
After the grout has fully cured, clean the tiles with a damp sponge to remove any grout haze. Inspect the installation for any imperfections or areas that may require touch-ups. Apply a silicone sealant around the edges of the tiled area to prevent water penetration and ensure longevity.
Conclusion:
Installing subway tiles in your bathroom can transform its aesthetic appeal and add a touch of elegance. By following these tips, you’ll be well-equipped to tackle this project with confidence. Remember to plan meticulously, prepare the surface properly, and use the right tools and materials. Whether you’re creating a classic subway tile pattern or exploring unique design possibilities, the end result will be a stunning bathroom that combines functionality with timeless style.