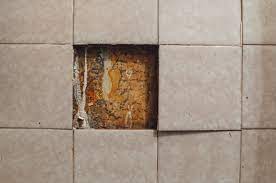
Tiling an unbalanced wall can be a tricky process, but with the right tools and techniques, it is definitely achievable. In this guide, we will take you through a step-by-step process of tiling an unbalanced wall.
Tools and Materials Needed:
- Tiles
- Tile adhesive
- Tile spacers
- Tile cutter or wet saw
- Level
- Trowel
- Grout
- Grout float
- Sponge
- Safety glasses
- Tape measure
Step 1: Measure the Wall
Measure the width and height of the wall you want to tile. If the wall is uneven, measure the highest and lowest points on the wall. This will help you determine how much adhesive and tiles you will need.
Step 2: Prepare the Wall
Before you start tiling, you need to prepare the wall. This involves removing any old tiles or wallpaper, and cleaning the wall with a damp cloth to remove any dirt or debris. You should also repair any cracks or holes in the wall and allow them to dry completely.
Step 3: Apply Tile Adhesive
Using a trowel, apply a layer of tile adhesive to the wall, starting from the bottom and working your way up. Make sure the adhesive is spread evenly across the wall.
Step 4: Install the Tiles
Place the first tile at the bottom of the wall, ensuring that it is level. Use tile spacers to ensure that the tiles are evenly spaced. Continue installing tiles, working your way up the wall. If the wall is uneven, you may need to use tile spacers of different sizes to compensate for the differences in the wall. Be sure to check the level of the tiles frequently to ensure that they are level.
Step 5: Cut the Tiles
Use a tile cutter or wet saw to cut the tiles to fit around any obstacles or edges. Measure the space that needs to be filled and cut the tile accordingly. Make sure to wear safety glasses when cutting the tiles.
Step 6: Allow the Adhesive to Dry
Allow the tile adhesive to dry completely before moving on to the next step. This can take anywhere from a few hours to overnight, depending on the type of adhesive you are using.
Step 7: Apply Grout
Using a grout float, apply grout between the tiles, working in small sections. Use a damp sponge to wipe away any excess grout. Allow the grout to dry for a few minutes before wiping away any remaining grout haze with a clean, damp sponge.
Step 8: Finish the Edges
Finish the edges of the tiled wall with either bullnose tiles or metal trim. This will give the wall a clean, finished look.
Tips for Tiling an Unbalanced Wall:
- Use a level frequently to ensure that the tiles are level.
- Use tile spacers of different sizes to compensate for differences in the wall.
- Cut tiles carefully to fit around obstacles and edges.
- Wear safety glasses when cutting tiles.
- Allow the adhesive and grout to dry completely before moving on to the next step.
- Use bullnose tiles or metal trim to finish the edges of the wall.
Conclusion:
Tiling an unbalanced wall may seem daunting at first, but with the right tools and techniques, it is definitely achievable. By following the step-by-step process outlined in this guide, you should be able to tile an unbalanced wall with ease. Remember to take your time, work carefully, and use a level frequently to ensure that the tiles are level.

