")
Stretch ceilings are a modern and versatile option for home design that can create a sleek and polished look in any room. They are easy to install, easy to maintain, and can be customized to fit any space. Here are some tips for installing a stretch ceiling in your home:
Choose the right material:
Stretch ceilings come in a variety of materials, including PVC, polyester, and membrane. Each material has its own benefits and drawbacks, so it’s important to choose the right one for your space. PVC is the most common material used for stretch ceilings because it is durable, waterproof, and easy to clean. Polyester is a great choice if you are looking for a more eco-friendly option, and membrane is a good choice for rooms with high humidity, such as bathrooms or kitchens.
Measure the space:
Before installing a stretch ceiling, it’s important to accurately measure the space. This will ensure that the ceiling fits properly and looks seamless. Measure the length and width of the room and add a few inches to each measurement to allow for the stretch ceiling to be attached to the perimeter frame.
Choose a color:
Stretch ceilings come in a wide range of colors and textures, so you can choose the one that best fits your style and decor. Some stretch ceilings even have printed designs, so you can create a unique and personalized look.
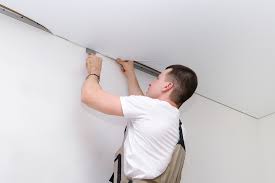
Hire a professional installer:
While stretch ceilings can be installed as a DIY project, it’s best to hire a professional installer. They will have the expertise and tools to ensure that the installation is done correctly, and they can also provide advice on the best material and color for your space.
Prepare the walls:
Before installing the stretch ceiling, it’s important to prepare the walls properly. They should be clean, dry, and smooth. Any roughness, cracks, or holes should be repaired before the installation.
Install the frame:
A perimeter frame is installed along the walls, which is where the stretch ceiling will be anchored. The frame can be made of aluminum or PVC and is typically installed using screws or anchors.
Install the lighting:
If you plan on adding lighting to your stretch ceiling, it’s important to install it before the ceiling is installed. You can choose to install recessed lighting or LED strips, which will create a warm and inviting ambiance in the room.
Install the stretch ceiling:
Once the frame and lighting are installed, it’s time to install the stretch ceiling. The ceiling is cut to the correct size and heated to make it pliable. It is then stretched across the frame and attached with clips. The seams are then welded together to create a seamless look.
Finish the edges:
The edges of the stretch ceiling are finished with a trim piece, which can be made of aluminum or PVC. The trim piece hides the clips and creates a clean and finished look.
In conclusion, a stretch ceiling is a great option for homeowners who want to create a modern and polished look in their home. With the right material, color, and lighting, you can create a unique and personalized space that reflects your style and personality. By hiring a professional installer and properly preparing the walls, you can ensure that the installation is done correctly and that your stretch ceiling will last for years to come.