")
Cambria wall cladding is an excellent way to transform the exterior of your home. This high-quality material is made from natural quartz and offers a range of benefits that make it an ideal choice for homeowners. In this article, we will explore the benefits of Cambria wall cladding and provide a step-by-step guide on how to install it in your home.
Benefits of Cambria Wall Cladding:
- Durability: Cambria wall cladding is incredibly durable and resistant to chipping, scratching, and staining. This makes it an excellent choice for exterior use, where it will be exposed to the elements.
- Low Maintenance: Because Cambria walls cladding is non-porous, it does not require sealing or waxing like other natural stone materials. This means that it is low maintenance and easy to clean.
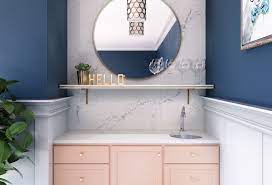
- Aesthetically Pleasing: Cambria walls cladding comes in a range of colors and patterns, making it easy to find a style that matches your home’s architecture and design. The material has a natural beauty that can add to the overall aesthetic of your home.
- Energy Efficient: Cambria wall cladding can help improve the energy efficiency of your home. Because it is a dense material, it can act as a natural insulator, helping to reduce heat loss in the winter and heat gain in the summer.
- Environmentally Friendly: Cambria walls cladding is an environmentally friendly material that is made from natural quartz. The manufacturing process uses recycled water, and the material is non-toxic and safe for use in your home.
Installation of Cambria Wall Cladding:
- Prepare the Surface: The first step in installing Cambria wall cladding is to prepare the surface. The surface should be clean and free of debris. If there are any existing finishes, such as paint or wallpaper, they should be removed.
- Measure the Area: Measure the area where you will be installing the Cambria wall cladding. This will help you determine how much material you need to order.
- Order the Material: Once you have measured the area, order the Cambria wall cladding from a reputable supplier. Make sure that you order enough material to cover the entire area and that you have accounted for any waste.
- Cut the Material: Use a saw to cut the Cambria wall cladding to the appropriate size. Make sure to wear eye and ear protection while cutting the material.
- Apply the Adhesive: Apply the adhesive to the back of the Cambria walls cladding using a trowel. Make sure that the adhesive is evenly distributed.
- Install the Wall Cladding: Carefully place the Cambria walsl cladding onto the prepared surface. Use spacers to ensure that the wall cladding is installed evenly and to allow for expansion.
- Grout the Joints: Once the Cambria walls cladding is installed, use a grout to fill the joints between the pieces. This will help to create a seamless look.
- Clean the Surface: Once the grout has dried, clean the surface of the Cambria walls cladding using a mild detergent and water. Rinse thoroughly with clean water and dry with a clean cloth.
Conclusion:
Cambria wall cladding is a beautiful and durable material that can transform the exterior of your home. By following these steps, you can install Cambria walsl cladding yourself and enjoy the benefits of this high-quality material. Whether you are looking to improve the energy efficiency of your home, enhance its aesthetic appeal, or simply add an extra layer of protection, Cambria walls cladding is an excellent choice.