")
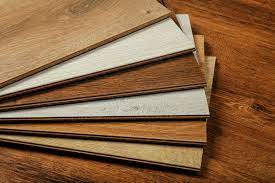
Coreluxe flooring is a popular type of luxury vinyl plank (LVP) flooring that is known for its durability, affordability, and ease of installation. If you’re looking to transform your home with new flooring, Coreluxe could be an excellent option for you. In this guide, we will walk you through the steps of Coreluxe flooring installation.
Step 1: Prepare the Subfloor
The first step in installing Coreluxe flooring is to prepare the subfloor. The subfloor should be clean, dry, and level. If the subfloor is not level, you will need to use a self-leveling compound to even it out. If the subfloor is made of concrete, you will also need to apply a moisture barrier.
Step 2: Acclimate the Flooring
Before installing the Coreluxe flooring, you should allow it to acclimate to the room’s temperature and humidity for at least 48 hours. This will help the flooring adjust to the room’s conditions and prevent any issues with expansion or contraction.
Step 3: Measure and Cut the Flooring
Measure the length and width of the room to determine how much Coreluxe flooring you will need. Be sure to add an extra 10% to account for waste and cuts. Use a utility knife or a chop saw to cut the planks to the appropriate length.
Step 4: Lay the First Row
Start by laying the first row of Coreluxe flooring along the longest wall in the room. Make sure to leave a ¼ inch gap between the wall and the flooring to allow for expansion. Use a tapping block and a hammer to lock the planks together securely.
Step 5: Continue Laying the Flooring
Continue laying the Coreluxe flooring row by row, making sure to stagger the seams so that they do not line up. Use a tapping block and a hammer to lock the planks together securely.
Step 6: Install the Last Row
The last row of Coreluxe floor may need to be cut to fit. Measure the width of the remaining space and cut the planks accordingly. Use a pull bar and a hammer to lock the planks together.
Step 7: Install the Baseboards and Transition Strips
Once the Coreluxe floor is installed, you can install the baseboards and transition strips. Use a finish nailer to attach the baseboards to the wall, making sure to leave a small gap between the baseboard and the flooring to allow for expansion. Install transition strips in doorways and where the Coreluxe floor meets other types of flooring.
Tips for Coreluxe Flooring Installation
- Use a tapping block and a hammer to lock the planks together securely.
- Make sure to leave a ¼ inch gap between the wall and the flooring to allow for expansion.
- Stagger the seams so that they do not line up.
- Cut the planks carefully to avoid damaging the flooring.
- Use a pull bar and a hammer to lock the planks together when installing the last row.
- Allow the flooring to acclimate to the room’s temperature and humidity for at least 48 hours before installation.
- Use a moisture barrier if installing Coreluxe flooring over concrete.
In conclusion, installing Coreluxe flooring can be a great way to transform your home. It is an affordable, durable, and easy-to-install flooring option that can give your home a new look and feel. By following these steps and tips, you can ensure a successful installation that will last for years to come.