")
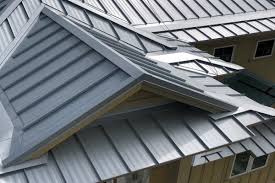
PVC standing seam roofing is an excellent choice for homeowners who want a durable, attractive, and long-lasting roof. Unlike traditional roofing materials, PVC standing seam roofing is made of durable plastic and is available in a variety of colors and finishes. In this guide, we will take you through the process of installing PVC standing seam roofing to help you transform the look of your home.
Materials needed:
- PVC standing seam roofing panels
- Screws
- Sealant
- Metal cutting shears or a circular saw with a metal cutting blade
- Drill
- Measuring tape
- Chalk line
- Ladder or scaffolding
- Safety gear (hard hat, gloves, safety glasses)
Step 1: Measure the roof
Before purchasing your PVC standing seam roofing panels, it’s essential to measure your roof accurately. Measure the length and width of the roof, as well as the slope or pitch. This information will help you determine how many panels you need and how to install them correctly.
Step 2: Prepare the roof
Before installing the PVC standing seam roofing panels, it’s essential to prepare the roof. Remove any old roofing materials, such as shingles or tiles, and inspect the roof for any damage or leaks. Repair any damage before installing the PVC standing seam roofing panels.
Step 3: Install the starter strip
The starter strip is the first piece of PVC standing seam roof that you will install. It’s a flat strip that runs along the edge of the roof and provides a secure base for the panels. Attach the starter strip to the roof using screws and sealant, following the manufacturer’s instructions.
Step 4: Install the first panel
Starting at one end of the roof, install the first PVC standing seam roofing panel. Attach the panel to the starter strip using screws and sealant, following the manufacturer’s instructions. Be sure to leave a small gap between the panel and the edge of the roof to allow for expansion and contraction.
Step 5: Install the remaining panels
Working your way across the roof, install the remaining PVC standing seam roofing panels. Be sure to overlap each panel slightly and attach them to the roof using screws and sealant. Use a chalk line to ensure that each panel is installed straight and level.
Step 6: Install the ridge cap
The ridge cap is the final piece of PVC standing seam roof that you will install. It covers the seam where the two sides of the roof meet. Install the ridge cap using screws and sealant, following the manufacturer’s instructions.
Step 7: Seal the roof
Once all the PVC standing seam roof panels are installed, it’s essential to seal the roof to prevent leaks. Apply sealant to any gaps or seams, following the manufacturer’s instructions. Be sure to use a sealant that is compatible with PVC roofing materials.
In conclusion, installing PVC standing seam roof is a straightforward process that can transform the look of your home. With proper preparation and installation, you can achieve a durable and long-lasting roof that will enhance the curb appeal of your home. Whether you’re a DIY enthusiast or a professional contractor, PVC standing seam roofing is an excellent choice for any roof project.