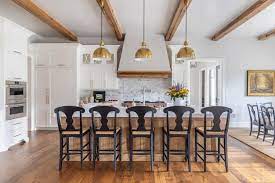
Shiplap roof boards are a popular choice for home renovation projects, as they can transform any room into a cozy and rustic space. Shiplap is a type of wooden board that is characterized by its distinctive overlapping profile, which creates a tight seal and helps to keep out drafts and moisture. Here is a guide on how to transform your home with shiplap roof boards:
Choose the Type of Shiplap
There are several types of shiplap roof boards that you can choose from, including cedar, pine, and spruce. Each type of wood has its own unique characteristics and can create a different look and feel in your home.
Cedar shiplap is a popular choice due to its natural resistance to moisture and insects, as well as its beautiful color and texture. Pine shiplap is also a popular choice, as it is affordable and easy to work with, and can be stained or painted to match any decor.
Measure the Room
Before you purchase your shiplap roof boards, you need to measure the room where you plan to install them. This will help you determine how many boards you need and how much material you will need to purchase.
Measure the length and width of each wall where you plan to install the shiplap, and then multiply these numbers to determine the total square footage of the room. Add an extra 10% to this number to account for any waste or mistakes during installation.
Choose the Installation Method
There are several installation methods that you can use when installing shiplap roof boards, including nailing, gluing, or using a tongue and groove system. The installation method you choose will depend on your skill level, the type of shiplap you are using, and the look you want to achieve.
If you are using traditional shiplap boards, you will need to nail them to the wall using finishing nails or a pneumatic nail gun. If you are using tongue and groove boards, you can glue them to the wall using construction adhesive or nail them in place using finishing nails.
Prepare the Walls
Before you begin installing the shiplap roof boards, you need to prepare the walls by removing any existing trim, baseboards, or moldings. If the walls are uneven or damaged, you may need to repair them before installing the shiplap.
Next, you need to clean the walls and make sure they are free of dust, dirt, and debris. You can use a vacuum or a damp cloth to clean the walls and ensure that they are smooth and flat.
Install the Shiplap
Once the walls are prepared, you can begin installing the shiplap roof boards. Start by measuring the height of the wall and cutting the first board to this length. You can use a circular saw or a miter saw to cut the boards to the appropriate length.
Next, apply a bead of construction adhesive to the back of the board and press it firmly against the wall. Use finishing nails or a pneumatic nail gun to secure the board in place, making sure to nail it into the studs behind the wall.
Continue installing the shiplap boards in this manner, making sure to stagger the boards to create a random pattern. Use a level to ensure that each board is straight and level, and make any necessary cuts to fit the boards around windows, doors, or other obstacles.
Finish the Shiplap
Once all of the shiplap roof boards are installed, you can finish them to create the desired look and feel. You can leave the boards natural for a rustic, weathered look, or you can paint or stain them to match your decor.
If you choose to paint the shiplap, use a high-quality paintbrush or a roller to apply a coat of primer to the boards, and allow it to dry completely. Then, apply a coat of paint in the color of your choice, making sure to use long, even strokes to create a smooth and even finish.
If you prefer a stained look, apply a coat of wood conditioner to the shiplap before staining, which will help to even out the color and prevent blotches. Then, use a brush or a cloth to apply the stain, wiping off any excess with a clean cloth.
Add Trim and Accessories
To complete the look of your shiplap roof board installation, you can add trim and accessories such as baseboards, moldings, or shelving. These finishing touches will help to create a polished and cohesive look and tie the room together.
You can choose from a variety of trim and molding styles, from traditional to modern, depending on the look you want to achieve. You can also add shelving or other accessories to the shiplap, such as hooks or artwork, to create a functional and stylish space.
In conclusion, shiplap roof boards are a versatile and affordable way to transform any room in your home into a cozy and inviting space. By choosing the right type of shiplap, measuring the room, preparing the walls, and installing the boards using the right method, you can create a beautiful and lasting installation that will enhance the look and feel of your home.

