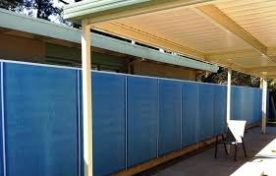
Blue board walls, also known as exterior insulation finishing systems (EIFS) or synthetic stucco walls, have gained popularity in the construction industry due to their exceptional durability, insulation properties, and aesthetic appeal. In this blog post, we will delve into the detailed process of constructing blue board walls, answering essential questions, and providing valuable insights along the way.
What are the key benefits of blue board walls?
Blue board walls offer several advantages, making them an attractive choice for both residential and commercial projects. Firstly, they provide excellent insulation, reducing energy consumption and enhancing the building’s energy efficiency. Additionally, blue board walls are resistant to water, fire, and impact, offering enhanced protection. Furthermore, their flexibility allows for intricate architectural designs, providing aesthetic versatility.
What materials are required for blue board wall construction?
To construct blue board walls, you will need the following materials:
Blue board panels: These panels consist of a foam insulation core coated with a cementitious base coat.
Adhesive: A specially formulated adhesive is used to attach the blue board panels to the substrate.
Base coat: A polymer-modified cementitious base coat is applied to the blue board panels for added strength and durability.
Mesh reinforcement: Fiberglass mesh is embedded into the base coat to enhance tensile strength and prevent cracking.
Finish coat: A colored or textured finish coat is applied over the base coat to achieve the desired aesthetic appearance.
What is the step-by-step process of constructing blue board walls?
Surface Preparation
Before installing the blue board panels, ensure that the substrate is clean, dry, and free from any loose debris. Repair any cracks or imperfections in the substrate to ensure a smooth surface for installation.
Applying Adhesive and Installing Blue Board Panels
Apply the adhesive to the back of the blue board panels using a notched trowel, ensuring even coverage. Press the panels firmly onto the prepared substrate, starting from the bottom and working your way up. Maintain a consistent gap between panels for expansion and contraction.
Base Coat Application
Prepare the base coat mixture in accordance with the instructions provided by the manufacturer. Apply the base coat using a trowel, covering the entire surface of the blue board panels. Embed the fiberglass mesh into the wet base coat, ensuring proper adhesion and avoiding any wrinkles or air pockets.
Curing and Drying
Permit the base coat to undergo the curing and drying process as per the specific instructions provided by the manufacturer. This process typically takes several days and may require proper ventilation and temperature control.
Applying the Finish Coat
Once the base coat has thoroughly dried, you can proceed with the application of the finish coat using either a trowel or a sprayer, depending on the desired texture. Ensure an even and consistent application, paying attention to any architectural details or design elements.
Maintenance and Inspection
Regularly inspect the blue board wall for any signs of damage or moisture infiltration. Perform routine maintenance, such as cleaning and repainting, to prolong the lifespan of the walls.
Conclusion:
Blue board walls offer a range of benefits, including insulation, durability, and aesthetic appeal. By adhering to the detailed process described above, you can effectively build blue board wall that offer durable protection and elevate the aesthetic appeal of your structure. Remember to prioritize proper surface preparation, use high-quality materials, and conduct regular maintenance to ensure the longevity and performance of your blue board walls.

