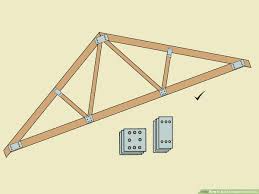
A half truss is a type of roof truss that is commonly used in residential and commercial construction. It is called a half truss because it is only half the length of a full truss, and is typically used in conjunction with another half truss to form a complete truss system.
Here is a step-by-step guide on how to build a half truss:
Step 1: Gather materials and tools To build a half truss, you will need the following materials:
- 2×4 lumber
- Plywood sheets
- Metal brackets and screws
- Roofing material
You will also need the following tools:
- Circular saw
- Power drill
- Hammer
- Level
- Measuring tape
Step 2: Determine the dimensions
The first step in building a half truss is to determine the dimensions. The dimensions will depend on the size of the roof and the pitch of the roof. You will need to determine the span, the rise, and the run of the roof.
Step 3: Cut the lumber
Once you have determined the dimensions, you can cut the lumber to size. You will need to cut two pieces of lumber for the top and bottom chords of the truss, and four pieces of lumber for the web members.
The length of the top and bottom chords will depend on the span of the roof. The length of the web members will depend on the rise and run of the roof.
Step 4: Assemble the truss
To assemble the truss, you will need to use metal brackets and screws. First, attach the top and bottom chords to the web members using metal brackets and screws.
Next, attach the plywood sheets to the web members using metal brackets and screws. The plywood sheets will provide additional support to the truss.
Step 5: Install the truss
Once the truss is assembled, you can install it on the roof. Use a level to ensure that the truss is level and plumb. Secure the truss to the roof using metal brackets and screws.
Step 6: Repeat the process To complete the truss system, you will need to repeat the process and build another half truss for the other side of the roof. Once both half trusses are installed, you can install the roofing material.
Step 7: Add additional support
Depending on the size of the roof and the load it will need to support, you may need to add additional support to the truss system. This can done by adding collar ties or ridge beams.
Collar ties are horizontal members that connect the two sides of the truss system. They typically install in the upper third of the truss system and help to prevent the roof from sagging.
Ridge beams are vertical members that run along the peak of the roof. They provide additional support to the truss system and help to distribute the weight of the roof evenly.
Step 8: Finish the roof
Once the truss system is in place and additional support has been add, you can finish the roof by installing the roofing material. This can done using shingles, metal panels, or other roofing materials.
In conclusion, building a half truss is a relatively simple process that can be completed with basic carpentry skills and tools. By following these steps, you can build a strong and durable truss system that will provide support to your roof for years to come.

