")
Introduction:
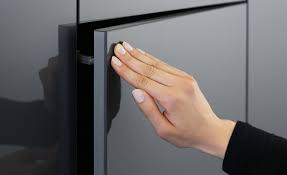
Handleless doors have become increasingly popular in modern home design, offering a sleek and minimalist look. With no visible handles, these doors create a seamless and streamlined appearance. If you’re considering installing handleless doors in your home, this step-by-step guide will walk you through the process, ensuring a successful and professional installation.
Step 1: Choose the Type of Handleless Doors:
There are different types of handleless doors available, such as push-to-open doors, recessed grip doors, or magnetic catch doors. Determine the type that best suits your style and preferences. Consider factors like functionality, ease of use, and compatibility with your existing door frames.
Step 2: Measure and Prepare the Door Opening:
Accurately measure the dimensions of the door opening where the handleless door will be installed. Ensure the opening is square by measuring the diagonals. Prepare the opening by removing any existing door, hardware, and trim. Clean the surface and make any necessary repairs or adjustments to ensure a smooth and level base.
Step 3: Install the Door:
Follow the manufacturer’s instructions to install the handleless door into the opening. Depending on the type of handleless door you’ve chosen, the installation process may vary. For push-to-open doors, attach the hinges to the door and then to the door frame. recessed grip doors, align the grip and secure it to the door. For magnetic catch doors, install the magnets on the door and the strike plates on the frame.
Step 4: Adjust the Door Alignment:
After installing the handleless door, check its alignment. Ensure that the door is level, plumb, and sits correctly within the frame. Make any necessary adjustments to the hinges or strike plates to achieve proper alignment. Test the door by opening and closing it to ensure smooth operation.
Step 5: Install Additional Hardware (if applicable):
Depending on the type of handleless door, you may need to install additional hardware for a complete installation. For push-to-open doors, attach the magnetic or mechanical push-to-open devices as per the manufacturer’s instructions. Ensure these devices are properly aligned and function smoothly.
Step 6: Test and Adjust the Door Operation:
Test the door’s operation by opening and closing it multiple times. Check for any obstructions or sticking points. Adjust the hinges or strike plates as needed to achieve a smooth and effortless operation. Ensure that the door closes securely and stays in place when closed.
Step 7: Finishing Touches:
Once the handleless door is properly installed and adjusted, apply any desired finishing touches. Paint or stain the door to match your interior design. Install any necessary trim or moldings around the door to enhance its appearance. Clean the door and surrounding area, removing any debris or fingerprints.
Step 8: Maintenance and Care:
Regularly clean and maintain the handleless door to keep it looking its best. Follow the manufacturer’s guidelines for cleaning and caring for the specific material of the door. Inspect the hinges and hardware periodically to ensure they are tight and functioning correctly.
Conclusion:
Handleless doors can elevate the aesthetic of your space and provide a modern and sleek look. By following these step-by-step instructions, you can successfully install handleless doors, creating a seamless and minimalist design element in your home. Enjoy the clean lines and functionality that handleless doors bring to your living environment.