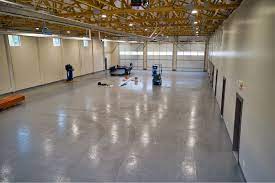
Installing a concrete floor in a pole barn can be a great investment for several reasons. It provides a durable and long-lasting surface that can withstand heavy use and is easy to maintain. Additionally, a concrete floor can help insulate the space and provide a solid foundation for any machinery or equipment that may be stored in the barn. Here are the steps to install a concrete floor in a pole barn:
Prepare the surface:
Before pouring concrete, it’s important to prepare the surface of the pole barn. This involves removing any debris or loose material from the floor, ensuring that the surface is level, and checking for any cracks or other damage that may need to be repaired. If necessary, fill any cracks or holes with a concrete patching compound and smooth out the surface with a trowel.
Install vapor barrier:
A vapor barrier is essential to prevent moisture from seeping up through the concrete and causing damage over time. Lay a plastic vapor barrier over the entire floor area, overlapping the edges and taping them together with waterproof tape. Be sure to leave a few inches of excess around the perimeter of the barn walls to allow for trimming later.
Build forms:
Forms are used to contain the concrete while it sets and ensure that it dries to the desired thickness and shape. Begin by building a perimeter form using 2×4 lumber, securing it to the walls of the barn with concrete anchors. Ensure that the form is level and square, using a level and measuring tape to check the height and distance from the wall. Then, build additional forms within the perimeter form to create sections for pouring the concrete. Secure the forms with stakes and braces to keep them in place.
Install reinforcement:
Reinforcement helps to strengthen the concrete and prevent cracking. Depending on the size of the pole barn and the intended use of the floor, reinforcement may include wire mesh or rebar. Place the reinforcement in the bottom of each form, ensuring that it is positioned evenly throughout the area.
Mix and pour concrete:
Follow the instructions on the bags of concrete mix to prepare the appropriate amount of concrete. Use a concrete mixer or wheelbarrow to mix the concrete thoroughly. Once mixed, begin pouring the concrete into the forms, starting at the far end of the barn and working your way toward the door. Use a trowel or float to spread the concrete evenly throughout the form, ensuring that it is level and smooth. Fill each form to the top and screed the surface with a long, straight board to create a smooth finish.
Finish the surface:
After the concrete has been poured and screeded, it’s time to finish the surface. This involves using a bull float to smooth the surface and eliminate any air pockets. Then, use a steel trowel to create a smooth finish on the surface. If desired, you can also add a non-slip surface to the floor by dragging a broom over the surface in a crosshatch pattern.
Allow the concrete to cure:
Concrete takes time to cure and harden, so it’s important to follow the manufacturer’s recommendations for drying and curing time. Generally, the concrete will need to dry for at least 24 hours before it can be walked on and several days before it can withstand heavy machinery or equipment. During the curing process, it’s important to keep the surface moist by spraying it with water periodically to prevent cracking.
Trim and finish the edges:
After the concrete has cured, use a saw or grinder to trim any excess vapor barrier that extends beyond the perimeter of the barn walls. Then, remove the perimeter form and use a trowel to smooth out any rough edges or imperfections on the surface. You may also choose to add a sealant or coating to the surface to further protect and enhance the appearance of the concrete floor.
Maintain the concrete floor:
Once the concrete floor is installed, it’s important to maintain it to ensure its longevity and durability. Sweep or mop the floor regularly to remove dirt and debris, and clean up any spills or stains as soon as possible to prevent them from penetrating the surface. You can also apply a concrete sealer or coating every few years to protect the surface from wear and tear.
In conclusion, installing a concrete floor in a pole barn can be a great investment for its durability, ease of maintenance, and insulation benefits. Following these steps, including preparing the surface, installing a vapor barrier, building forms, installing reinforcement, mixing and pouring concrete, finishing the surface, allowing the concrete to cure, trimming and finishing the edges, and maintaining the concrete floor, can help ensure a successful installation. With proper maintenance, a concrete floor can provide a solid foundation for years to come.

