")
Installing concrete anchors for tents is an important step in securing your tent to the ground and ensuring that it can withstand wind, rain, and other weather conditions. Here is a step-by-step guide on how to install concrete anchors for tents:
Determine the Type and Size of the Anchor
There are several types of concrete anchors that you can use for your tent, including wedge anchors, sleeve anchors, and drop-in anchors. The type of anchor you choose will depend on the soil conditions, the size of your tent, and the expected weather conditions.
You should also choose the appropriate size of anchor based on the diameter and length of the tent stakes or guy lines that you plan to use. In general, the anchor should be at least two times the diameter of the stake or guy line.
Mark the Location of the Anchor
Once you have chosen the type and size of anchor, you need to mark the location where you will install the anchor. Use a measuring tape or a ruler to measure the distance from the tent stake or guy line to the anchor location.
You can mark the location of the anchor by placing a stake or a marker at the center of the location. You can also use spray paint or chalk to mark the location directly on the ground.
Prepare the Anchor Hole
Use a drill with a masonry bit to drill a hole in the concrete where you marked the location of the anchor. The diameter of the hole should be slightly larger than the diameter of the anchor.
Make sure to wear eye protection and a dust mask while drilling, as the process can create dust and debris. You can use a vacuum or a brush to clean out the hole and remove any debris.
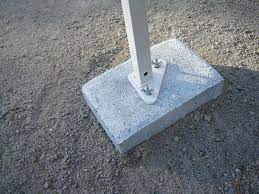
Insert the Anchor
Insert the anchor into the hole and use a hammer to tap it lightly until it is flush with the surface of the concrete. Make sure that the anchor is straight and not tilted in any direction.
If you are using a sleeve anchor or a drop-in anchor, you will need to tighten the nut or bolt until the anchor is secure. If you are using a wedge anchor, you will need to use a wrench to tighten the nut until the anchor is secure.
Attach the Guy Line or Tent Stake
Once the anchor is in place, you can attach the guy line or tent stake to the anchor. For tent stakes, you can insert the stake through the eyelet on the tent and into the ground, making sure that it is secure.
For guy lines, you can tie a knot in the line and attach it to the anchor using a carabiner or a hook. Make sure that the guy line is tight and that the tent is securely anchored to the ground.
Repeat for Additional Anchors
Depending on the size of your tent and the expected weather conditions, you may need to install additional anchors. Repeat the above steps for each anchor, making sure to space them out evenly around the perimeter of the tent.
In general, you should install one anchor for every 10 feet of tent length or width. For larger tents or in areas with high winds or other extreme weather conditions, you may need to install more anchors.
Test the Anchors
Once all of the anchors are in place, it is important to test them to ensure that they are secure. You can do this by pulling on the guy lines or tent stakes to see if they move or come loose.
If the guy lines or tent stakes are loose, you may need to tighten the anchors or add additional anchors to ensure that the tent is securely anchored to the ground.
In summary, installing concrete anchors for tents is an important step in securing your tent to the ground and protecting it from wind, rain, and other weather conditions. By choosing the appropriate type and size of anchor, marking the location of the anchor,preparing the anchor hole, inserting the anchor, attaching the guy line or tent stake, repeating for additional anchors, and testing the anchors, you can ensure that your tent stays put and remains safe during your camping trip or outdoor event.