")
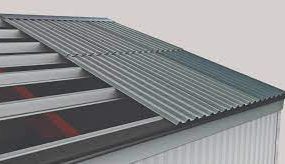
Metal roofing is a popular option for its durability, low maintenance, and energy efficiency. Overlapping metal roofing, also known as standing seam roofing, is a type of metal roofing that features panels that interlock with each other. The interlocking panels make it an excellent choice for both residential and commercial roofing projects. Here is a step-by-step guide on how to install overlapping metal roofing.
Step 1: Gather the Required Materials and Tools
Before beginning the installation process, ensure that you have all the necessary materials and tools. You will need:
- Overlapping metal roofing panels
- Roof underlayment
- Roofing screws
- Sealant tape
- Roofing membrane
- Metal snips
- Tin roof cutters
- Metal roofing crimping tool
- Measuring tape
- Chalk line
- Safety equipment, including gloves, safety glasses, and a hard hat.
Step 2: Prepare the Roof
The roof must be properly prepared before you begin installing the overlapping metal roofing panels. This involves removing the existing roofing material, ensuring the roof deck is sound, and installing a roofing underlayment.
The roofing underlayment is a protective barrier that goes on top of the roof deck but beneath the metal roofing. It helps to prevent moisture from entering the roof and helps with noise reduction.
Step 3: Measure and Cut the Metal Panels
The next step is to measure the length of the roof and cut the metal panels to the correct size. Use a measuring tape and a chalk line to mark where the panels need to be cut.
When cutting the panels, use metal snips or a tin roof cutter. Be careful not to damage the panels or cut them too short.
Step 4: Install the Metal Panels
To install the overlapping metal panels, start at the bottom of the roof and work your way up. Use a metal roofing crimping tool to crimp the edges of the panels to create a watertight seal.
Attach the panels to the roof deck using roofing screws. The screws should be installed in the flat area of the panel and should not penetrate the raised seams.
Overlap each panel with the one next to it by at least one inch. This will help to ensure a tight fit and a watertight seal.
Step 5: Install the Ridge Cap
Once the panels are installed, it’s time to install the ridge cap. The ridge cap is the metal flashing that covers the peak of the roof.
To install the ridge cap, cut the metal panels to the correct size and shape. Attach the ridge cap to the roof using roofing screws and sealant tape to create a watertight seal.
Step 6: Seal the Roof
The final step in the installation process is to seal the roof. This involves using a roofing membrane or sealant tape to create a watertight seal around the edges of the roof, including the ridge cap and any vents or other openings.
Apply the membrane or tape according to the manufacturer’s instructions. This will help to prevent water from entering the roof and causing damage.
Tips for Installing Overlapping Metal Roofing
- Always wear safety equipment when installing overlapping metal roof, including gloves, safety glasses, and a hard hat.
- Take your time and follow the manufacturer’s instructions carefully. Rushing the installation process can result in mistakes and a roof that is not watertight.
- Use quality materials and tools to ensure a durable and long-lasting roof.
- Consider hiring a professional roofing contractor if you are not comfortable with installing overlapping metal roofing yourself.
In conclusion, overlapping metal roofing is a popular and durable option for both residential and commercial roofing projects. By following these steps and tips, you can successfully install overlapping metal roofing on your home or building.